Adding CI/CD
In modern software development, you continuously build, test and deploy iterative code changes. This process helps reduce the chance that you develop new code based on buggy or failed previous versions. These principles can also be applied to network infrastructure configuration. Creating a Continuous Integration / Continuous Development (CI/CD) process for network configuration lowers the amount of human intervention, and minimizes risk associated with changes.
Consider the limitations imposed in a production environment, by following the simple or comprehensive example. Storing the code locally allows only a single user to make modifications. Making the code available in a Git repository would not fully address problem as the Terraform state is still stored locally. Only the user that ran terraform apply would be aware of the latest state of the configuration.
This section of Network-as-Code helps the user create a basic CI/CD environment using GitLab. It serves as an example. GitLab offers powerful features such as the ability to create Git repositories, create teams, manage Terraform state, and CI/CD.
This guide helps you to set up a pipeline with the following stages:
- Validate
- Build
- Deploy
- Cleanup
Step 1: Getting started with Gitlab
Section titled “Step 1: Getting started with Gitlab”Sign up for a GitLab SaaS account at GitLab. If you prefer self-managing your own GitLab instance you can download the packages here. This guide uses the SaaS version of GitLab, but the same principles apply.
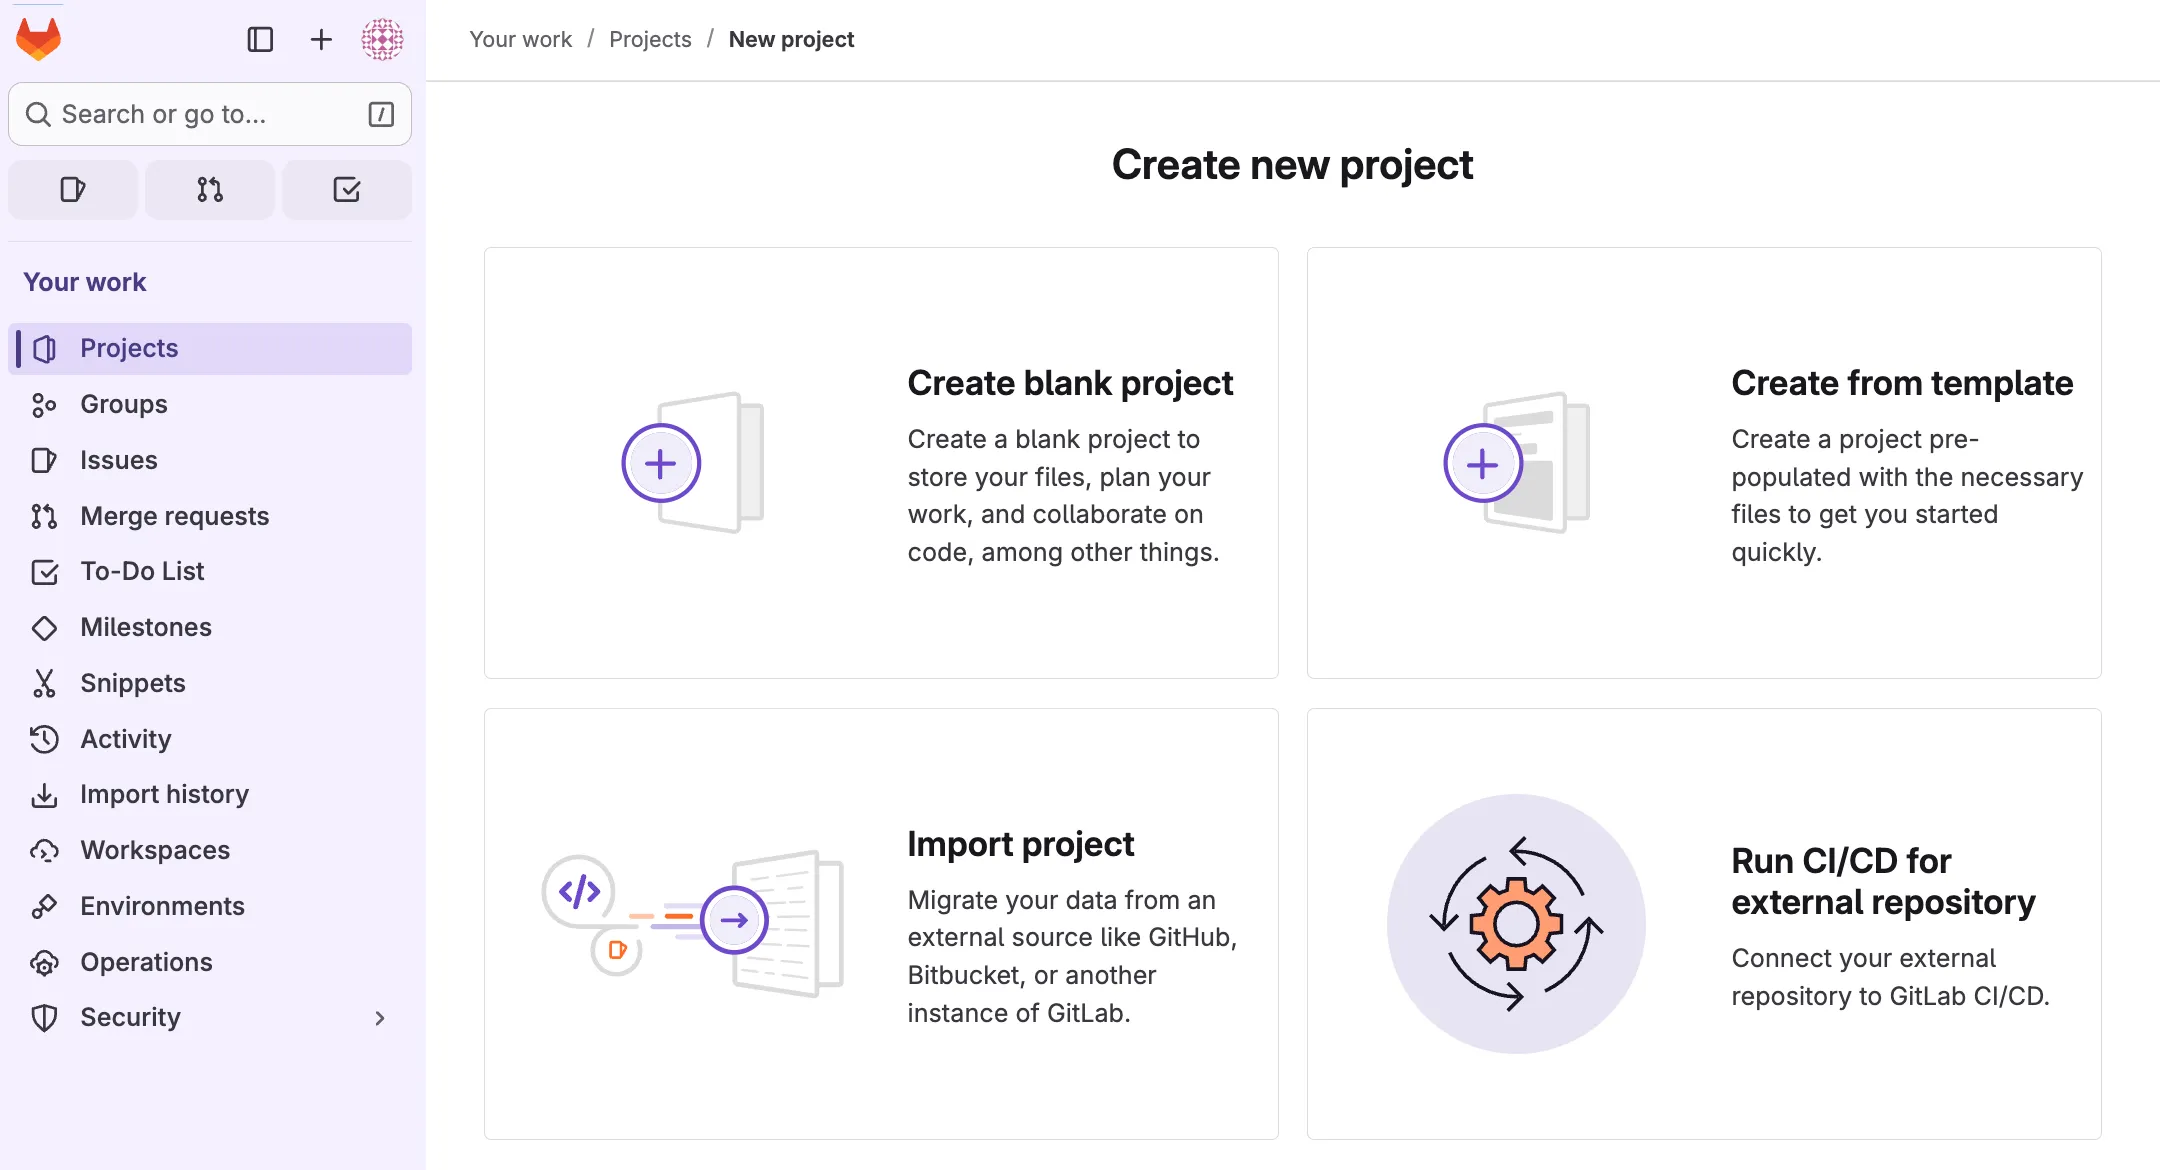
After creating your account, sign in to GitLab. After your first login you are prompted with a few questions. You can either create a new project from here, or create a project from the GitLab dashboard.
Select Import Project.
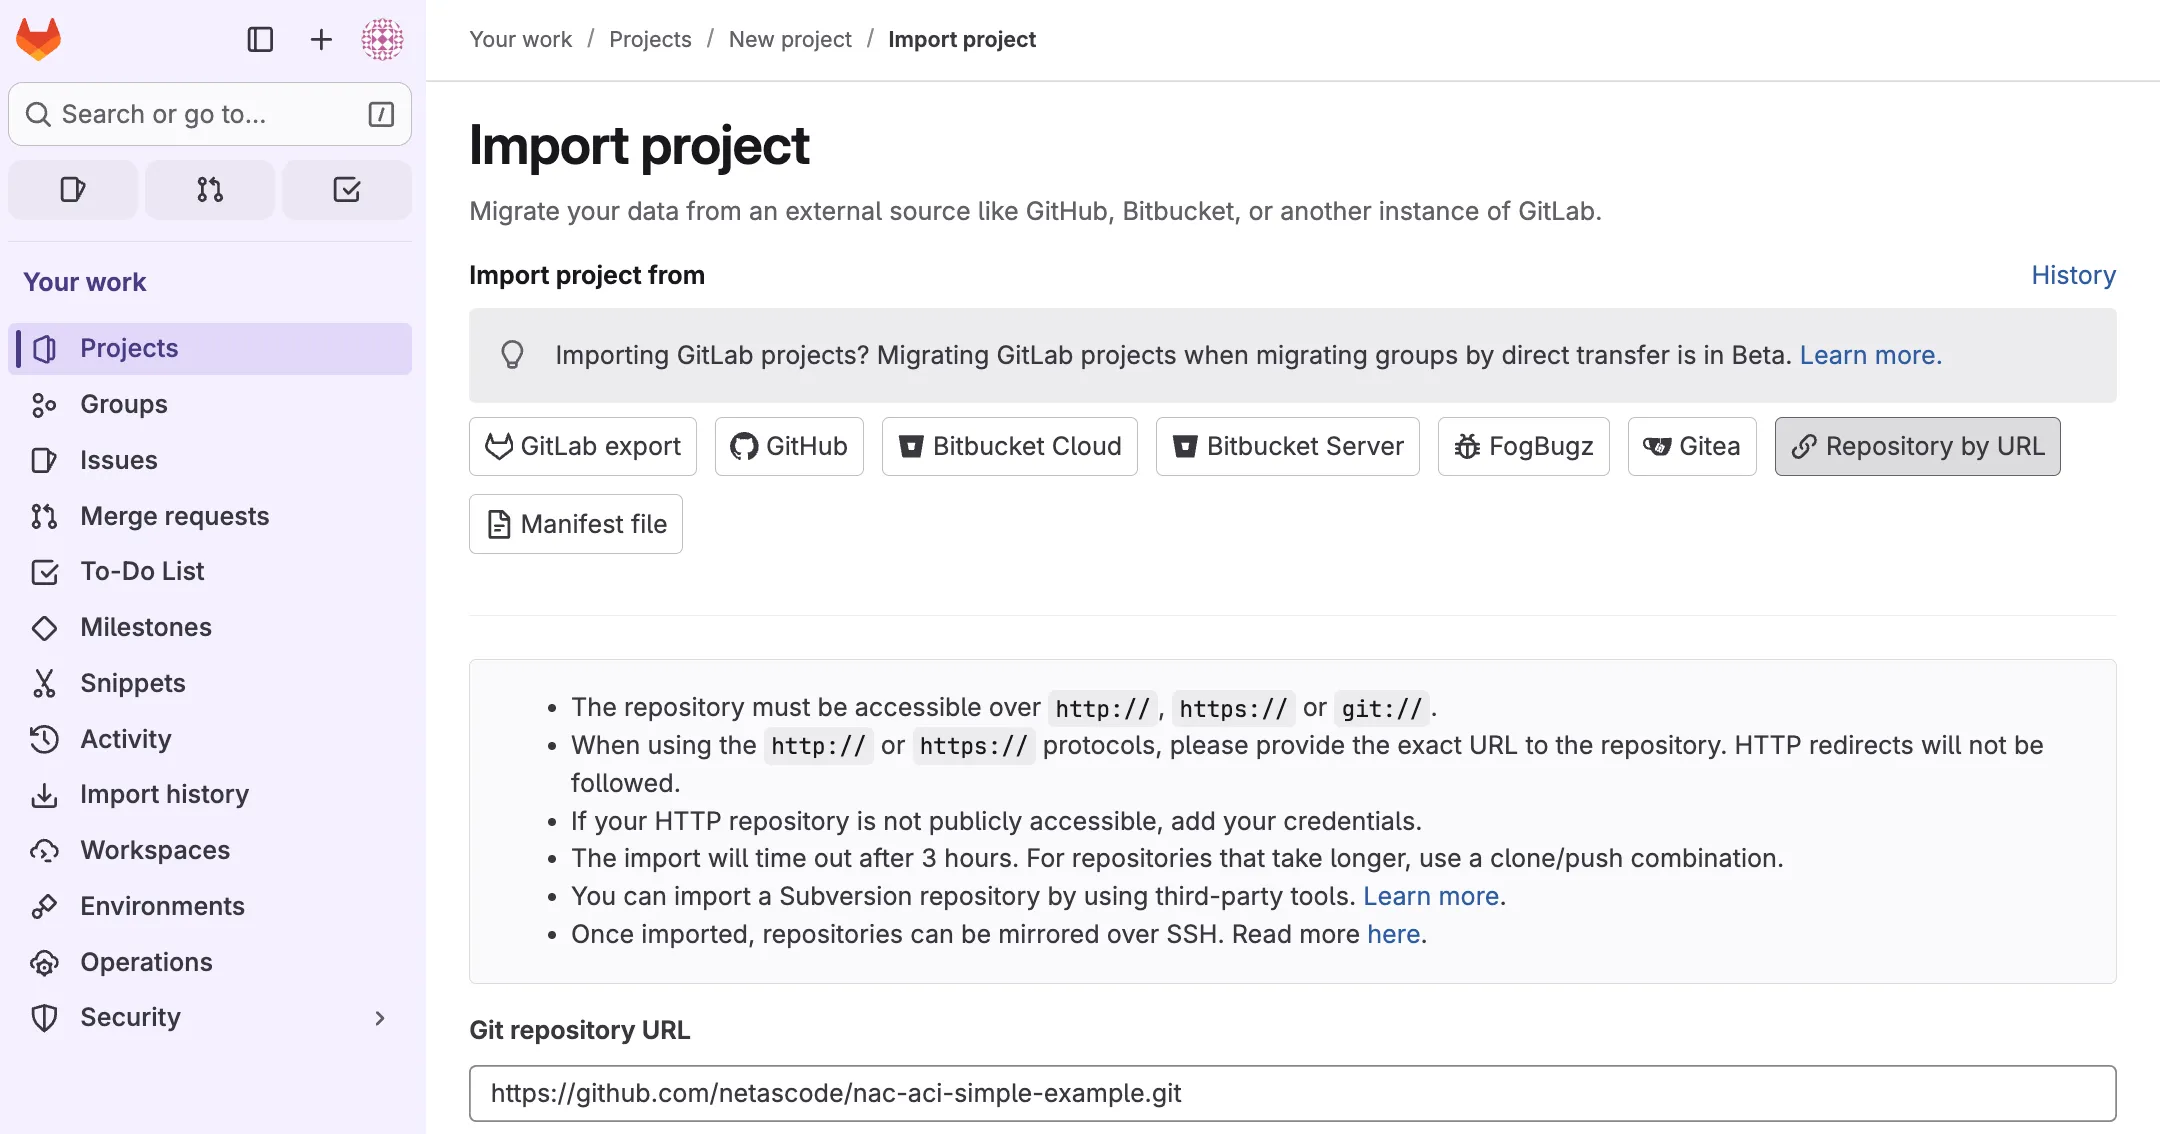
Under Import Project from select Repository by URL. Set the GIT repository URL to https://github.com/netascode/nac-aci-simple-example.git.
Give the project a Name, Description, and make sure to keep the repository private. Click on Create project once you are satisfied with your configuration.
Step 2: Setting up a Runner
Section titled “Step 2: Setting up a Runner”The environment must typically be prepared with a Runner. A Runner is a process that picks up and executes CI/CD jobs for GitLab projects. As it is unlikely for the Application Policy Infrastructure Controller (APIC) to be reachable from the internet, a (local) runner may be used to access it. Runners can be installed using Linux, macOS, FreeBSD, and Windows. It can be installed:
- In a container.
- By downloading a binary manually.
- By using a repository for rpm/deb packages.
This guide assumes installation on Linux through rpm/deb packages. It also assumes that Docker Engine is installed as the Runner will be set up as Docker Executor. This allows the Runner to connect to Docker Engine to run and build each build in a separate and isolated container using a predefined image that will be configured later. For instructions on how to install Docker Engine, see: Docker Engine Installation. It is advised to install the Runner on a dedicated (virtual) machine instead of locally on your computer.
To install GitLab Runner:
- Add the official GitLab repository:
For Debian/Ubuntu/Mint:
curl -L "https://packages.gitlab.com/install/repositories/runner/gitlab-runner/script.deb.sh" | sudo bashFor RHEL/CentOS/Fedora:
curl -L "https://packages.gitlab.com/install/repositories/runner/gitlab-runner/script.rpm.sh" | sudo bash- Install the latest version of GitLab Runner: For Debian/Ubuntu/Mint:
sudo apt-get install gitlab-runnerFor RHEL/CentOS/Fedora:
sudo yum install gitlab-runner- Create a new Runner:
Within the imported project, navigate to Settings > CI/CD, and expand the Runners section. Click on Create project runner to add a new runner for this project. Select the operating system of choice and make sure to check run untagged jobs. Optionally add a description for the runner.
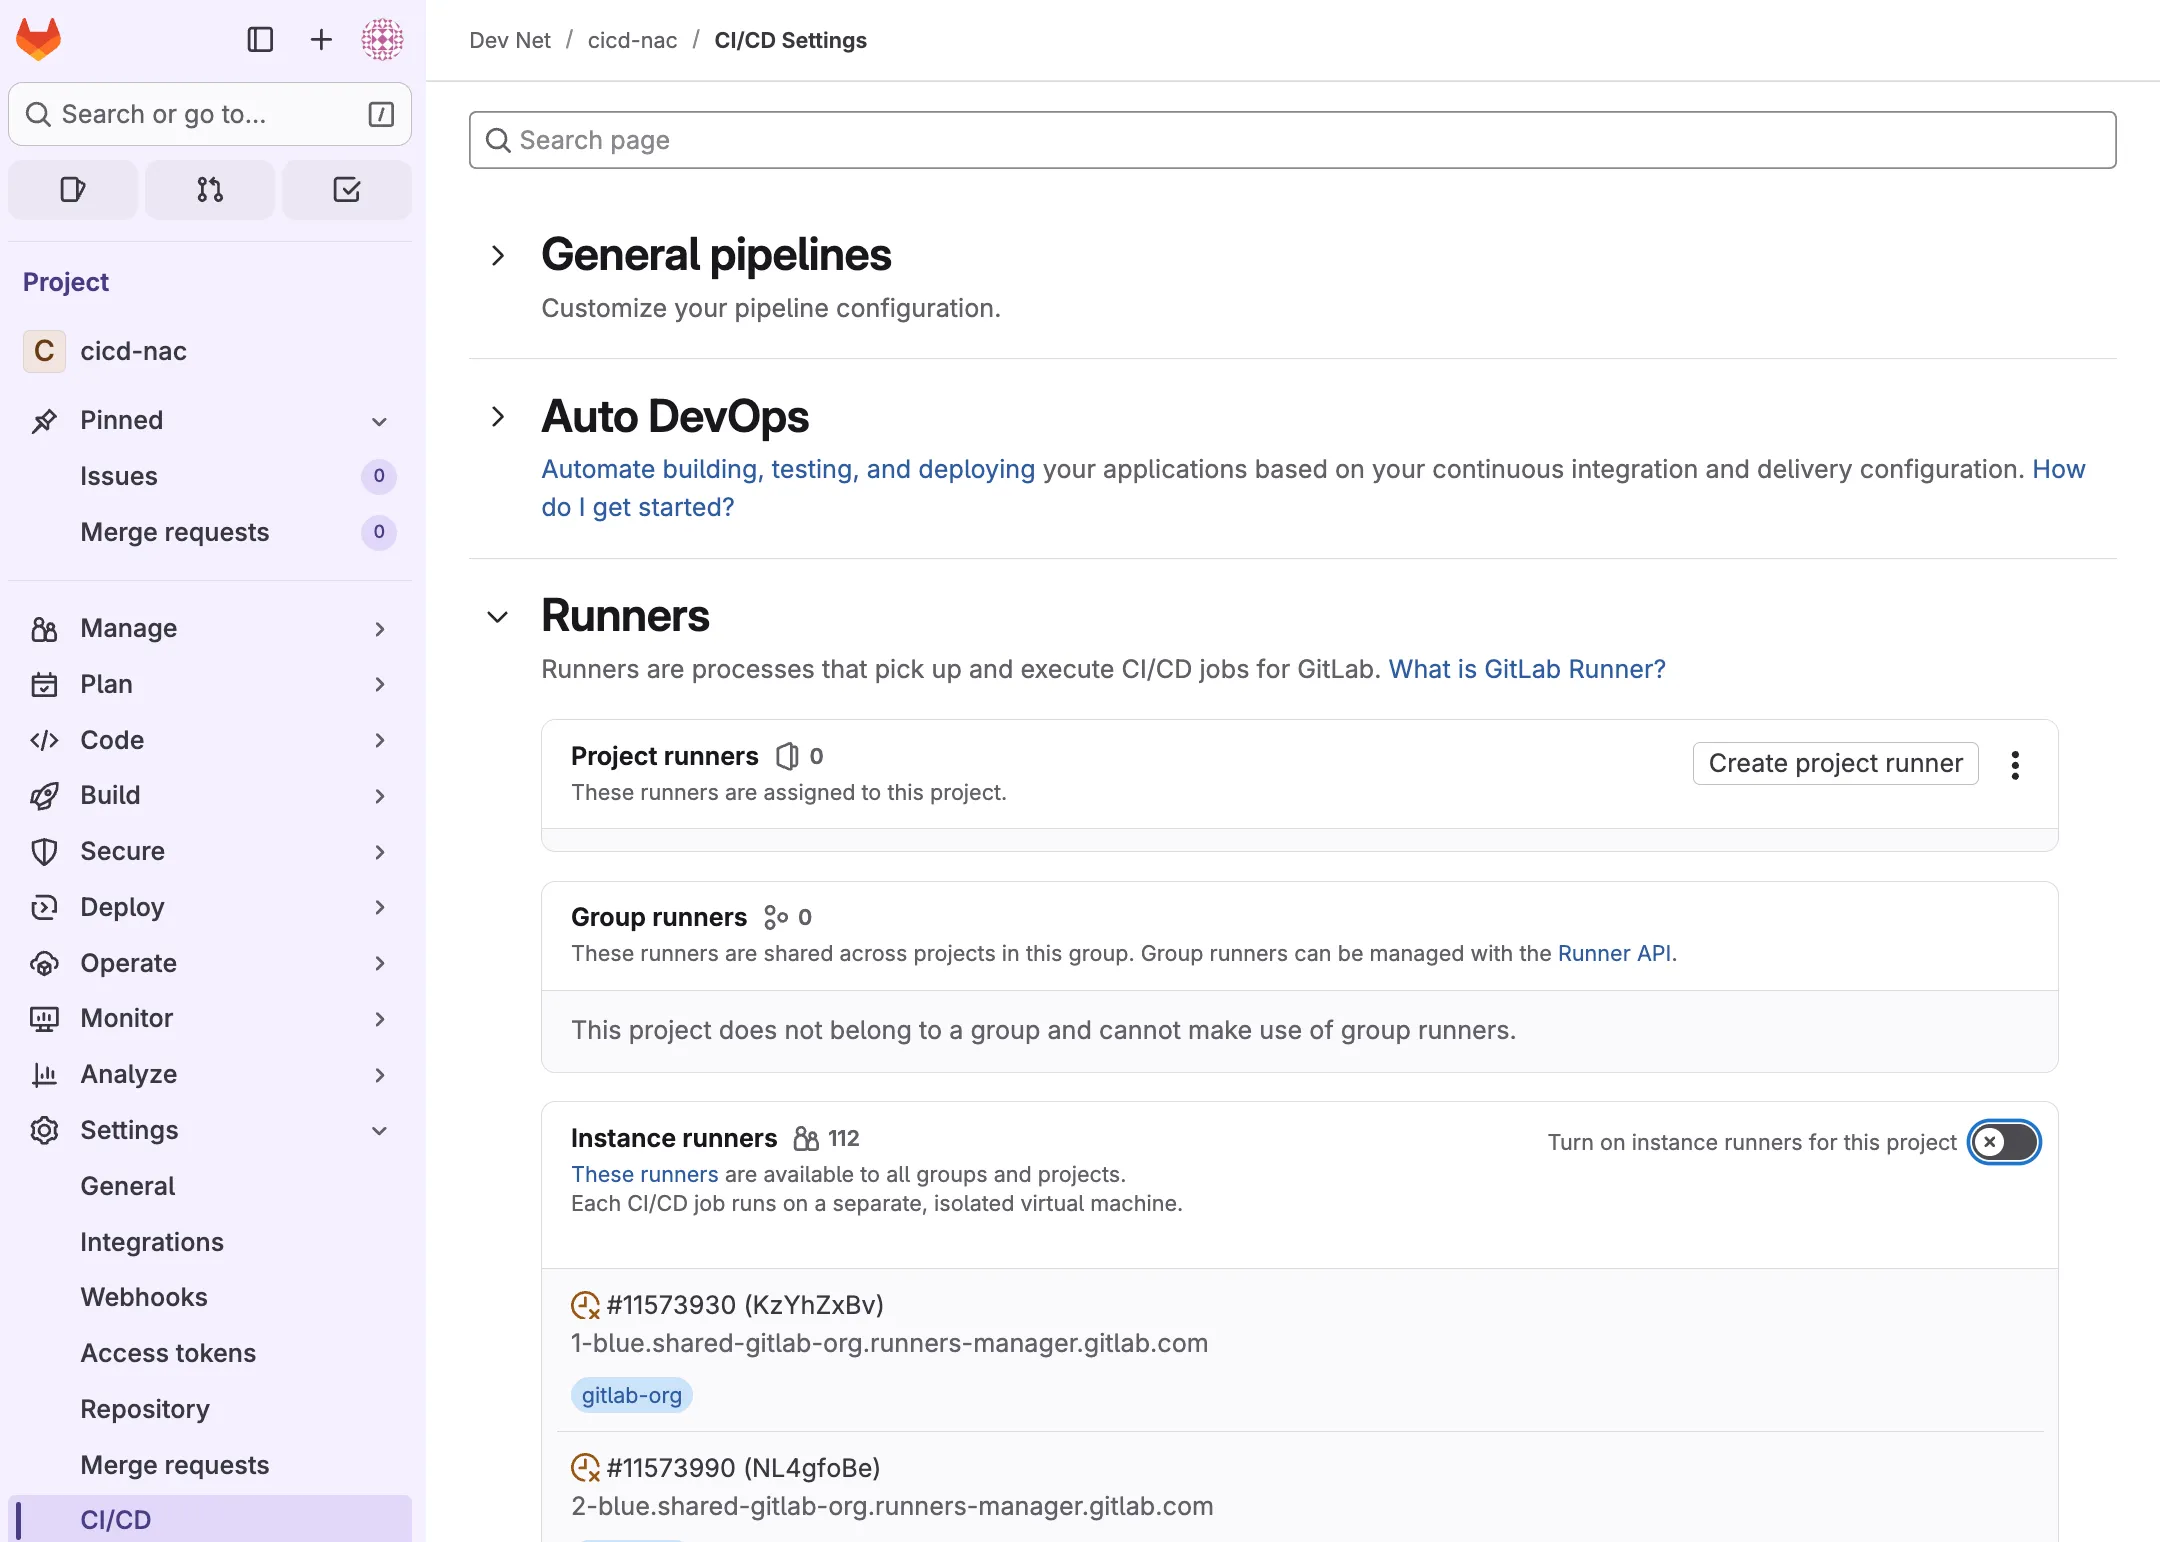
Disable using Instance runners for this project. Note that if this is not disabled, available shared runners will start picking-up CI/CD jobs. It is unlikely these have access to the APIC controllers. Hence this option should be disabled.
- Register the runner: On the machine where the runner is installed, run the provided command:
gitlab-runner register --url https://gitlab.com --token glrt-xxxxand provide the following configuration:
- URL: https://gitlab.com (note that this is a different URL when you use self-managed GitLab)
- Name:
Optionally provide a name - Executor:
docker - Default Docker image:
docker
Completed output (not that your output may look different depending on the operating system):
gitlab-runner register  --url https://gitlab.com  --token glrt-xxxx
Enter the GitLab instance URL (for example, https://gitlab.com/):[https://gitlab.com]:Verifying runner... is valid                        correlation_id=ee674944d1ac4090a5ec961320c70e8b runner=Py8QHuPeTEnter a name for the runner. This is stored only in the local config.toml file:[centos-stream10-runners]: cicd-nac-runnerEnter an executor: virtualbox, docker-windows, docker+machine, kubernetes, ssh, docker, docker-autoscaler, instance, custom, shell, parallels:dockerEnter the default Docker image (for example, ruby:3.3):dockerRunner registered successfully. Feel free to start it, but if it's running already the config should be automatically reloaded!
Configuration (with the authentication token) was saved in "/home/<user>/.gitlab-runner/config.toml"
Make sure that your Runner is listed as available in GitLab:

For issues with the GitLab Runner installation please see: Runner FAQ. You can verify whether gitlab-runner is running and can contact GitLab with gitlab-runner status and gitlab-runner verify. In case the runner seems active but is not picking up jobs in the pipeline in a later step, you may also try to use the sudo gitlab-runner run& to run the process in the background.
Completed output (note that your output may look different depending on your local machine):
[root@localhost ~]# gitlab-runner statusRuntime platform                                    arch=amd64 os=linux pid=1598 revision=9ba718cd version=18.3.0gitlab-runner: Service is running
[root@localhost ~]# gitlab-runner verifyRuntime platform                                    arch=amd64 os=linux pid=1606 revision=9ba718cd version=18.3.0WARNING: Running in user-mode.WARNING: The user-mode requires you to manually start builds processing:WARNING: $ gitlab-runner runWARNING: Use sudo for system-mode:WARNING: $ sudo gitlab-runner...
Verifying runner... is valid                        correlation_id=8f7a6ca9a3794e5aa31d8af0aac9f0b4 runner=Py8QHuPeT
Step 3: Creating a pipeline
Section titled “Step 3: Creating a pipeline”In the newly created GitLab project main page, click the clone button and copy the URL displayed under Clone with HTTPS.
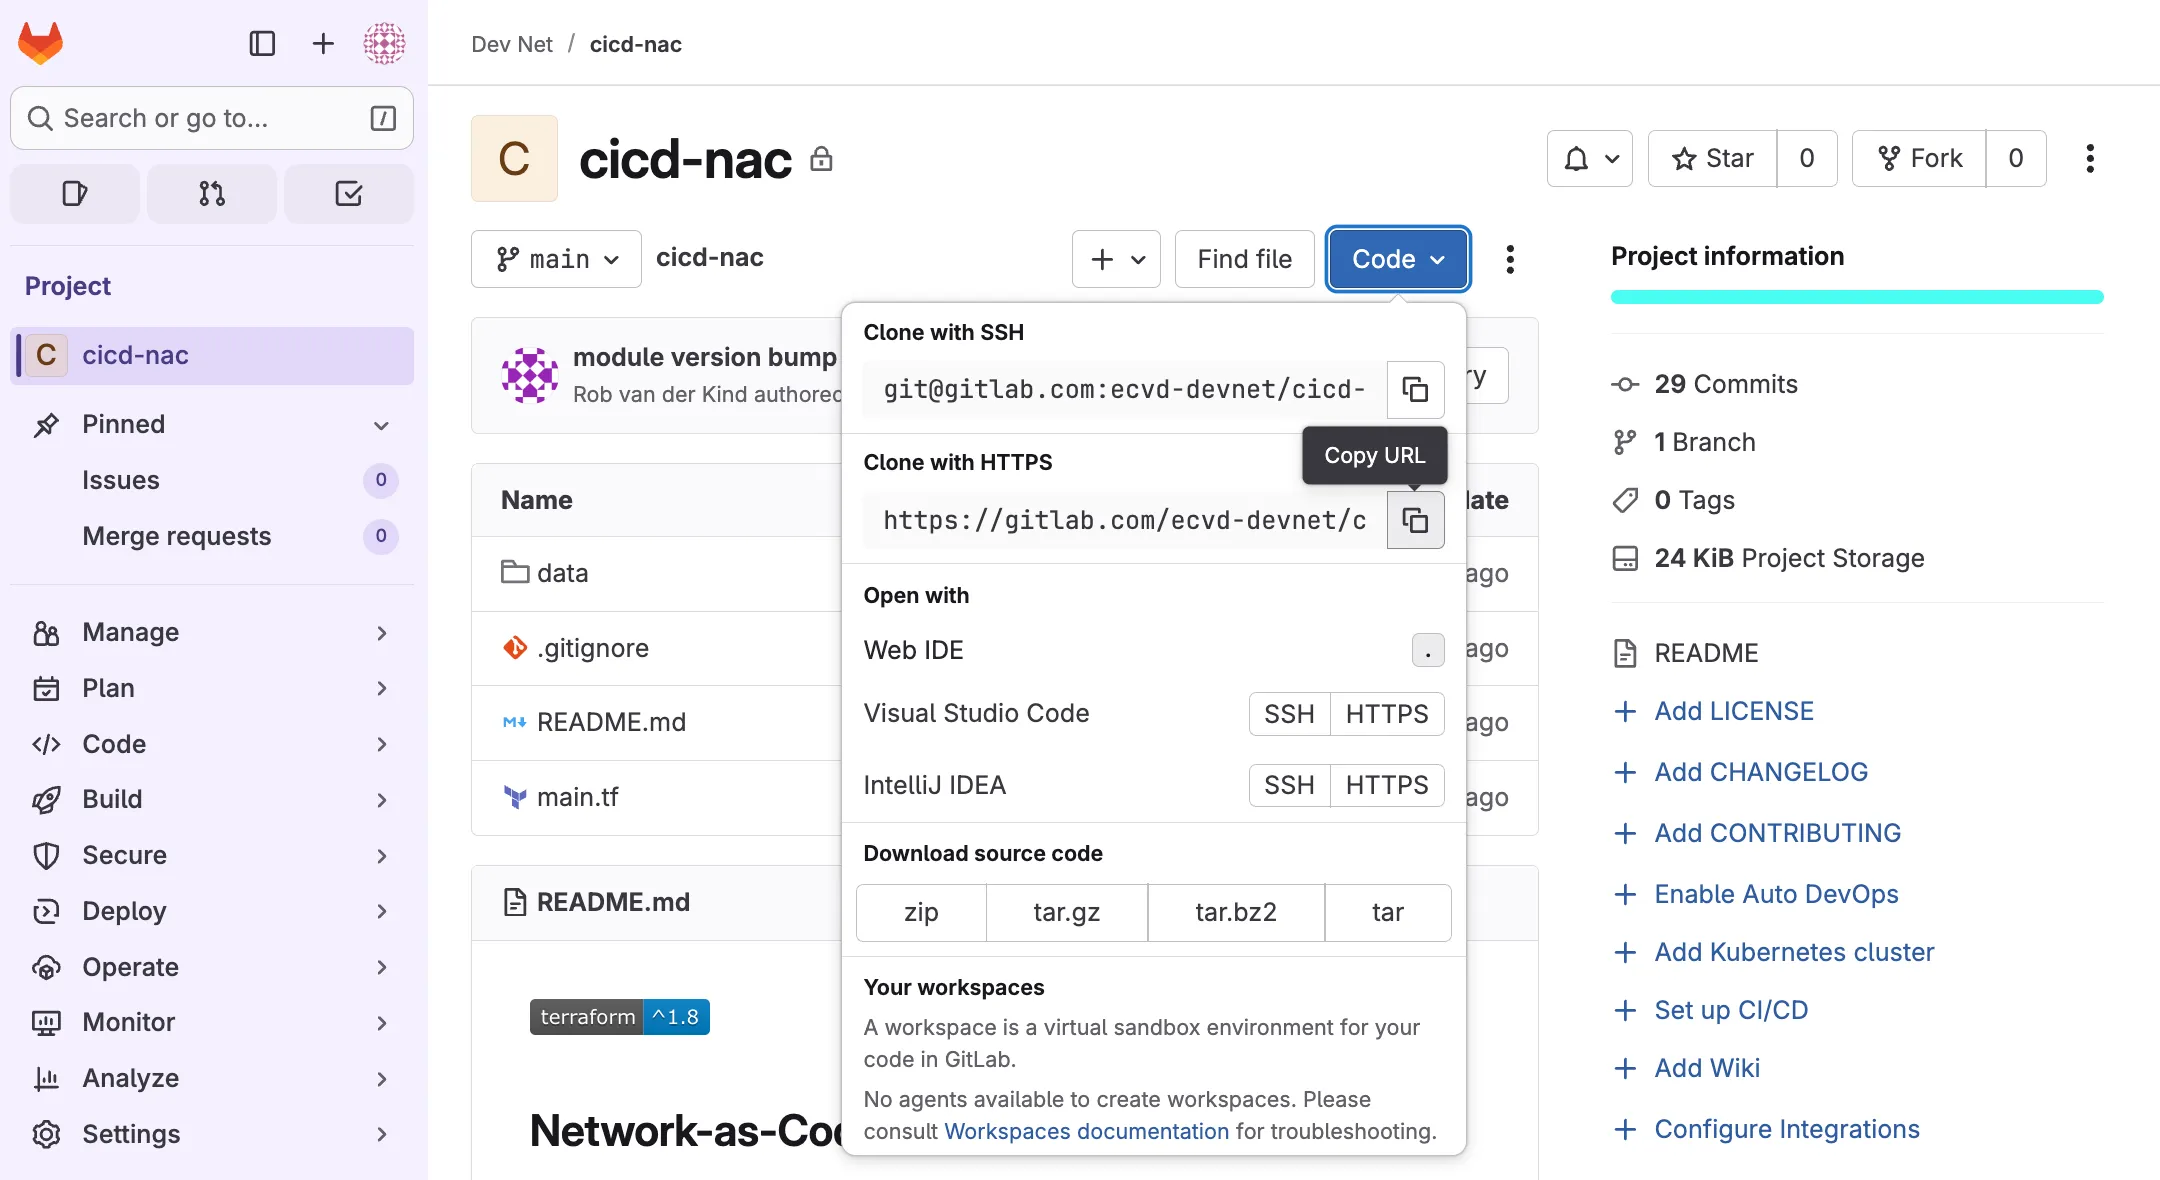
When using Visual Studio Code, navigate to view -> Command palette..., type clone and select the Git: Clone option. Provide the repository URL from the GitLab project.
A prompt will appear to select a folder where the cloned repository should be stored. Select a path and continue with Select as Repository Destination. When prompted to open the cloned repository, select open.
Alternatively, the repository can be cloned from the command-line interface.
~/Documents/coding > git clone https://gitlab.com/your-org/your-project.gitCloning into 'cicd-nac'...remote: Enumerating objects: 121, done.remote: Total 121 (delta 0), reused 0 (delta 0), pack-reused 121 (from 1)Receiving objects: 100% (121/121), 24.29 KiB | 4.86 MiB/s, done.Resolving deltas: 100% (59/59), done.Create a new file .gitlab-ci.yml in the root of this folder and add the following code:
image:  name: hashicorp/terraform:latest  entrypoint: [""]
variables:  TF_ROOT: ${CI_PROJECT_DIR}  TF_ADDRESS: ${CI_API_V4_URL}/projects/${CI_PROJECT_ID}/terraform/state/${CI_PROJECT_NAME}
before_script:  - export TF_HTTP_USERNAME="gitlab-ci-token"  - export TF_HTTP_PASSWORD="${CI_JOB_TOKEN}"  - export TF_HTTP_LOCK_METHOD="POST"  - export TF_HTTP_UNLOCK_METHOD="DELETE"  - export TF_HTTP_RETRY_WAIT_MIN="5"  - cd ${TF_ROOT}  - |    terraform init -reconfigure \      -backend-config="address=${TF_ADDRESS}" \      -backend-config="lock_address=${TF_ADDRESS}/lock" \      -backend-config="unlock_address=${TF_ADDRESS}/lock"
cache:  key: ${CI_COMMIT_REF_SLUG}  paths:    - ${TF_ROOT}/.terraform
stages: [validate, build, deploy, cleanup]
fmt:  stage: validate  script:    - terraform fmt -check  allow_failure: false
validate:  stage: validate  script:    - terraform validate  allow_failure: false
build:  stage: build  script:    - terraform plan -out=plan.tfplan  artifacts:    name: "Terraform Plan: ${CI_COMMIT_REF_SLUG}"    paths:      - ${TF_ROOT}/plan.tfplandeploy:  stage: deploy  script:    - terraform apply -input=false plan.tfplan  dependencies:    - build  rules:    - if: '$CI_COMMIT_BRANCH == $CI_DEFAULT_BRANCH'      when: manual    - when: never
cleanup:  stage: cleanup  script:    - terraform destroy -auto-approve  dependencies:    - deploy  when: manual  rules:    - if: '$CI_COMMIT_BRANCH == $CI_DEFAULT_BRANCH'
Save the file and continue with the next step.
For more information about .gitlab-ci.yml and other examples, see: .gitlab-ci.yml
Step 4: Changing Terraform Backend
Section titled “Step 4: Changing Terraform Backend”When using Runners it becomes even more important to use a remote backend. The reason is that each job in the pipeline is ran by a new, immutable container which runs a specific task and completes. The Terraform state would be lost forever without a remote backend. Navigate to main.tf and add a remote backend section for terraform. This instructs Terraform to make use of a remote backend.
terraform { backend "http" { }}The beginning of your main.tf file should now look like this:
terraform {  required_providers {    aci = {      source = "CiscoDevNet/aci"    }  }}
terraform {  backend "http" {  }}~output omitted~
Save the updated main.tf file and continue with the next step.
Note that there are multiple options for remote backends such as AWS S3, Consul or Terraform Cloud. This guide leverages the built-in Terraform backend provided by GitLab.
Step 5: Managing variables
Section titled “Step 5: Managing variables”As this code will be stored centrally in a GitLab repository, it is a good practice to replace any credentials or sensitive data with variables. These variables can be stored securely in GitLab and passed to your Runner as environment variables when executing different jobs. Note that this only happens when your branch is set to protected, which is the default setting. This setting can be overruled per variable setting.
In the provider "aci" block you can remove username, password and url, as those will be passed as environment variables.
provider "aci" {}Keep in mind the use of a username and password is easiest, but the use of signature-based authentication is preferred. For more information see Terraform Provider Documentation.
The final main.tf file should look like this:
terraform {  required_providers {    aci = {      source = "CiscoDevNet/aci"    }  }}
terraform {  backend "http" {  }}
provider "aci" {}
module "aci" {  source  = "netascode/nac-aci/aci"  version = "1.x.x"
  yaml_directories = ["data"]
  manage_access_policies    = false  manage_fabric_policies    = false  manage_pod_policies       = false  manage_node_policies      = false  manage_interface_policies = false  manage_tenants            = true}
Save the updated main.tf file.
Now that these values have been replaced by variables you have to provide their values in GitLab. Open your project in GitLab, and navigate to Settings > CI/CD, and expand Variables:
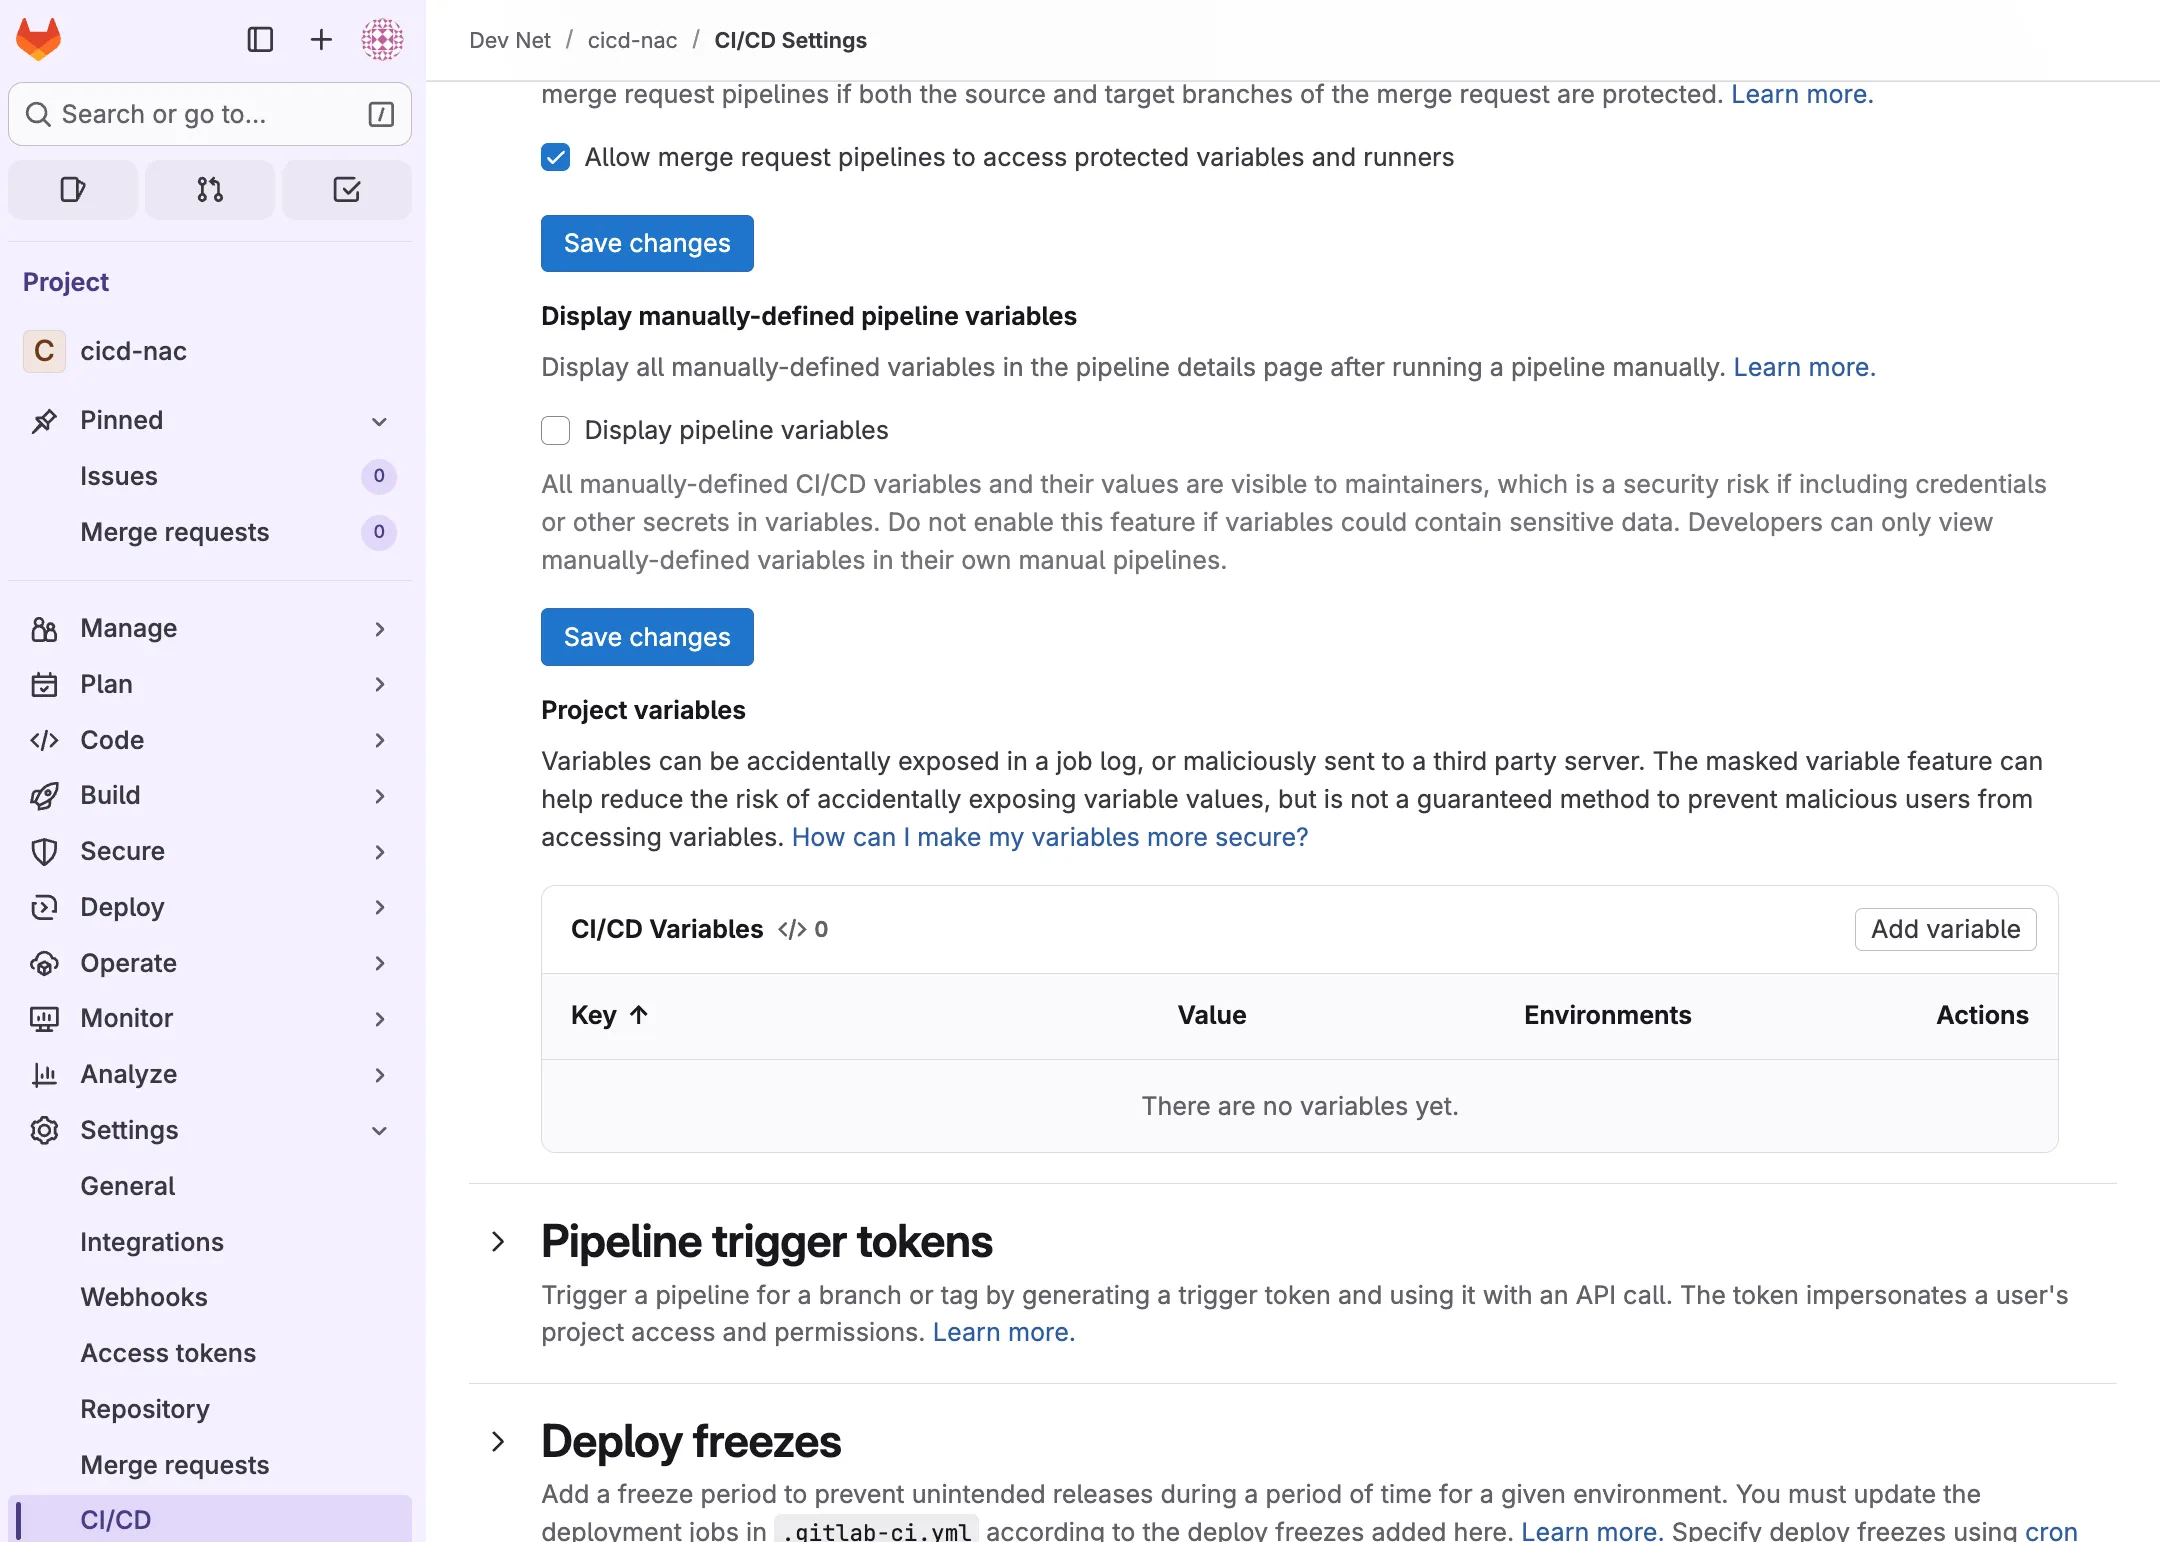
Click Add variable to add the variables used for authentication against APIC:
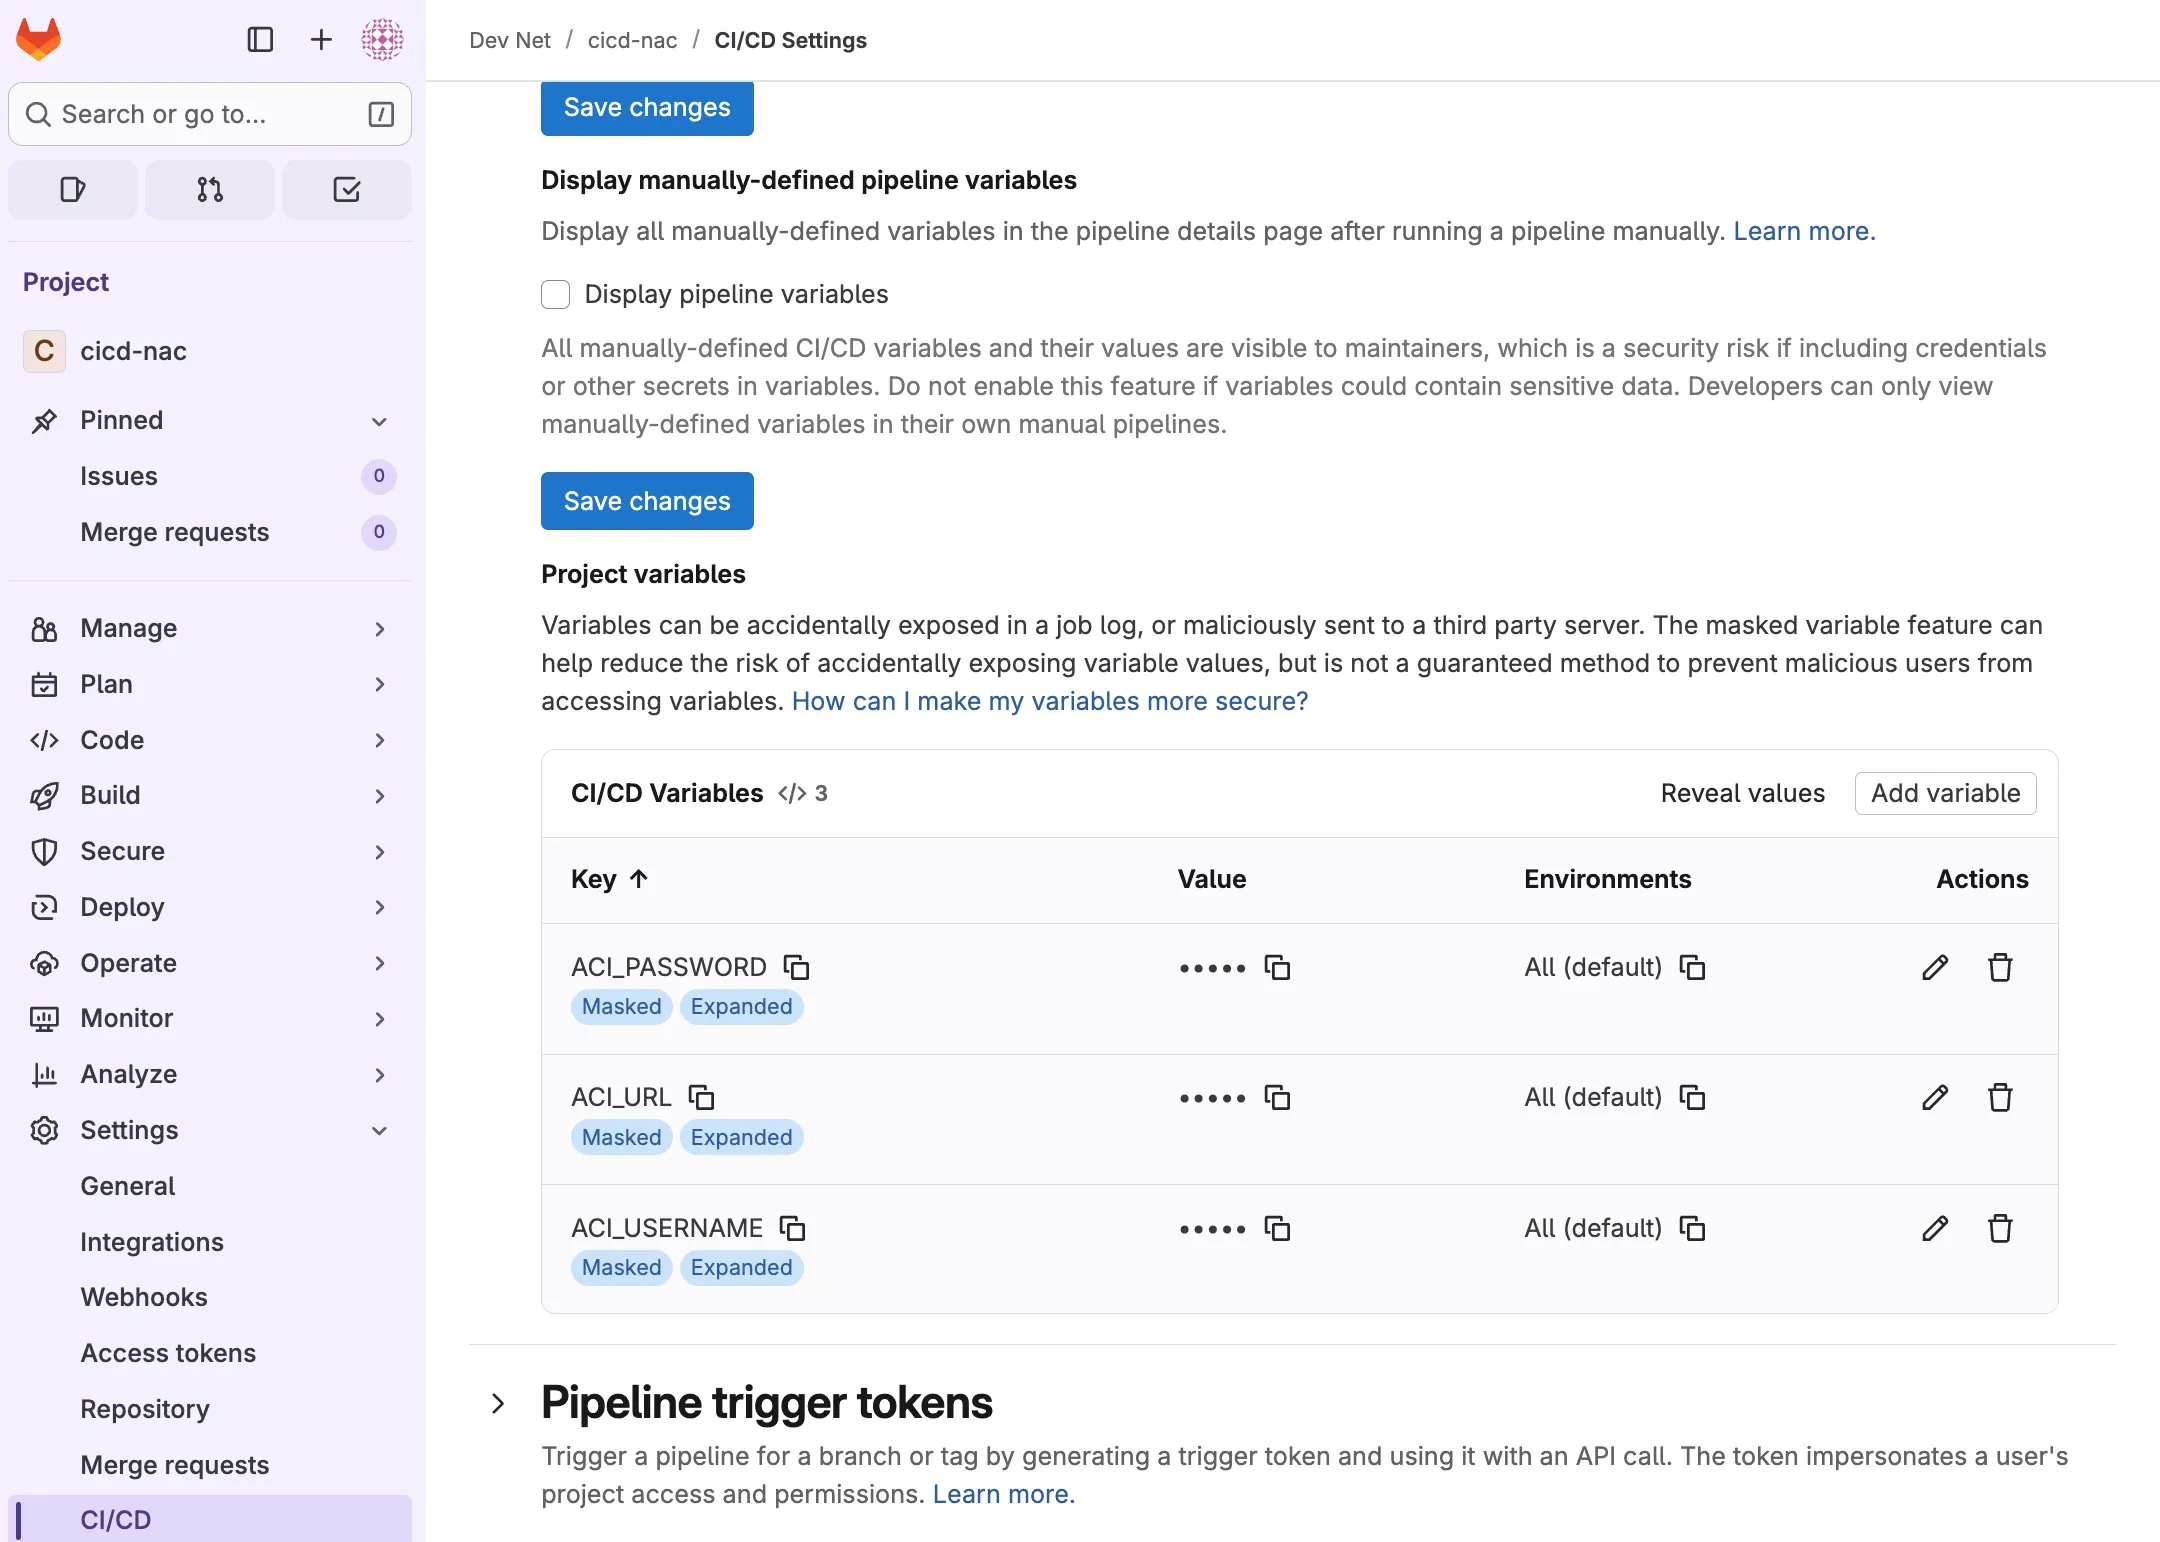
Complete this step for ACI_USERNAME, ACI_PASSWORD, and ACI_URL. Uncheck Protect variable for each variable.
Once your variables have been added, continue with the next step.
Step 6: Pushing the code
Section titled “Step 6: Pushing the code”The pipeline definition has been added to the new file gitlab-ci.yml and main.tf has been modified to make use of a remote backend in step 4, and any sensitive data is replaced with GitLab variables in step 5. The next step is to add the new file to staging, and commit the changes.
Before committing changes, the Git username and Email address must be provided. This is how changes can be tracked to an individual user.
git config --global user.name "First Last"git config --global user.email "first@example.com"When using Visual Studio Code select the Source Control tab on the left hand side. Stage the changes by clicking on the + button next to Changes. After adding a commit Message, changes can be committed to the local copy of the repository:
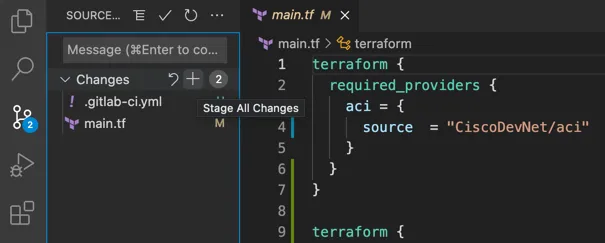
Followed by a push operation:
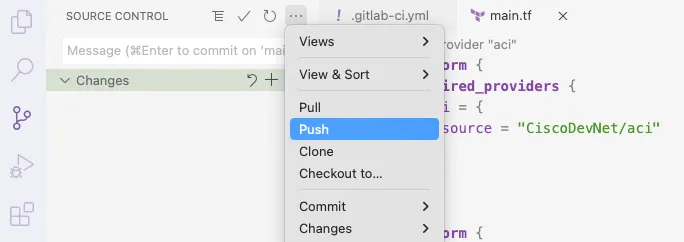
Alternatively this can be done from the command-line interface. Navigate to the cloned folder and run:
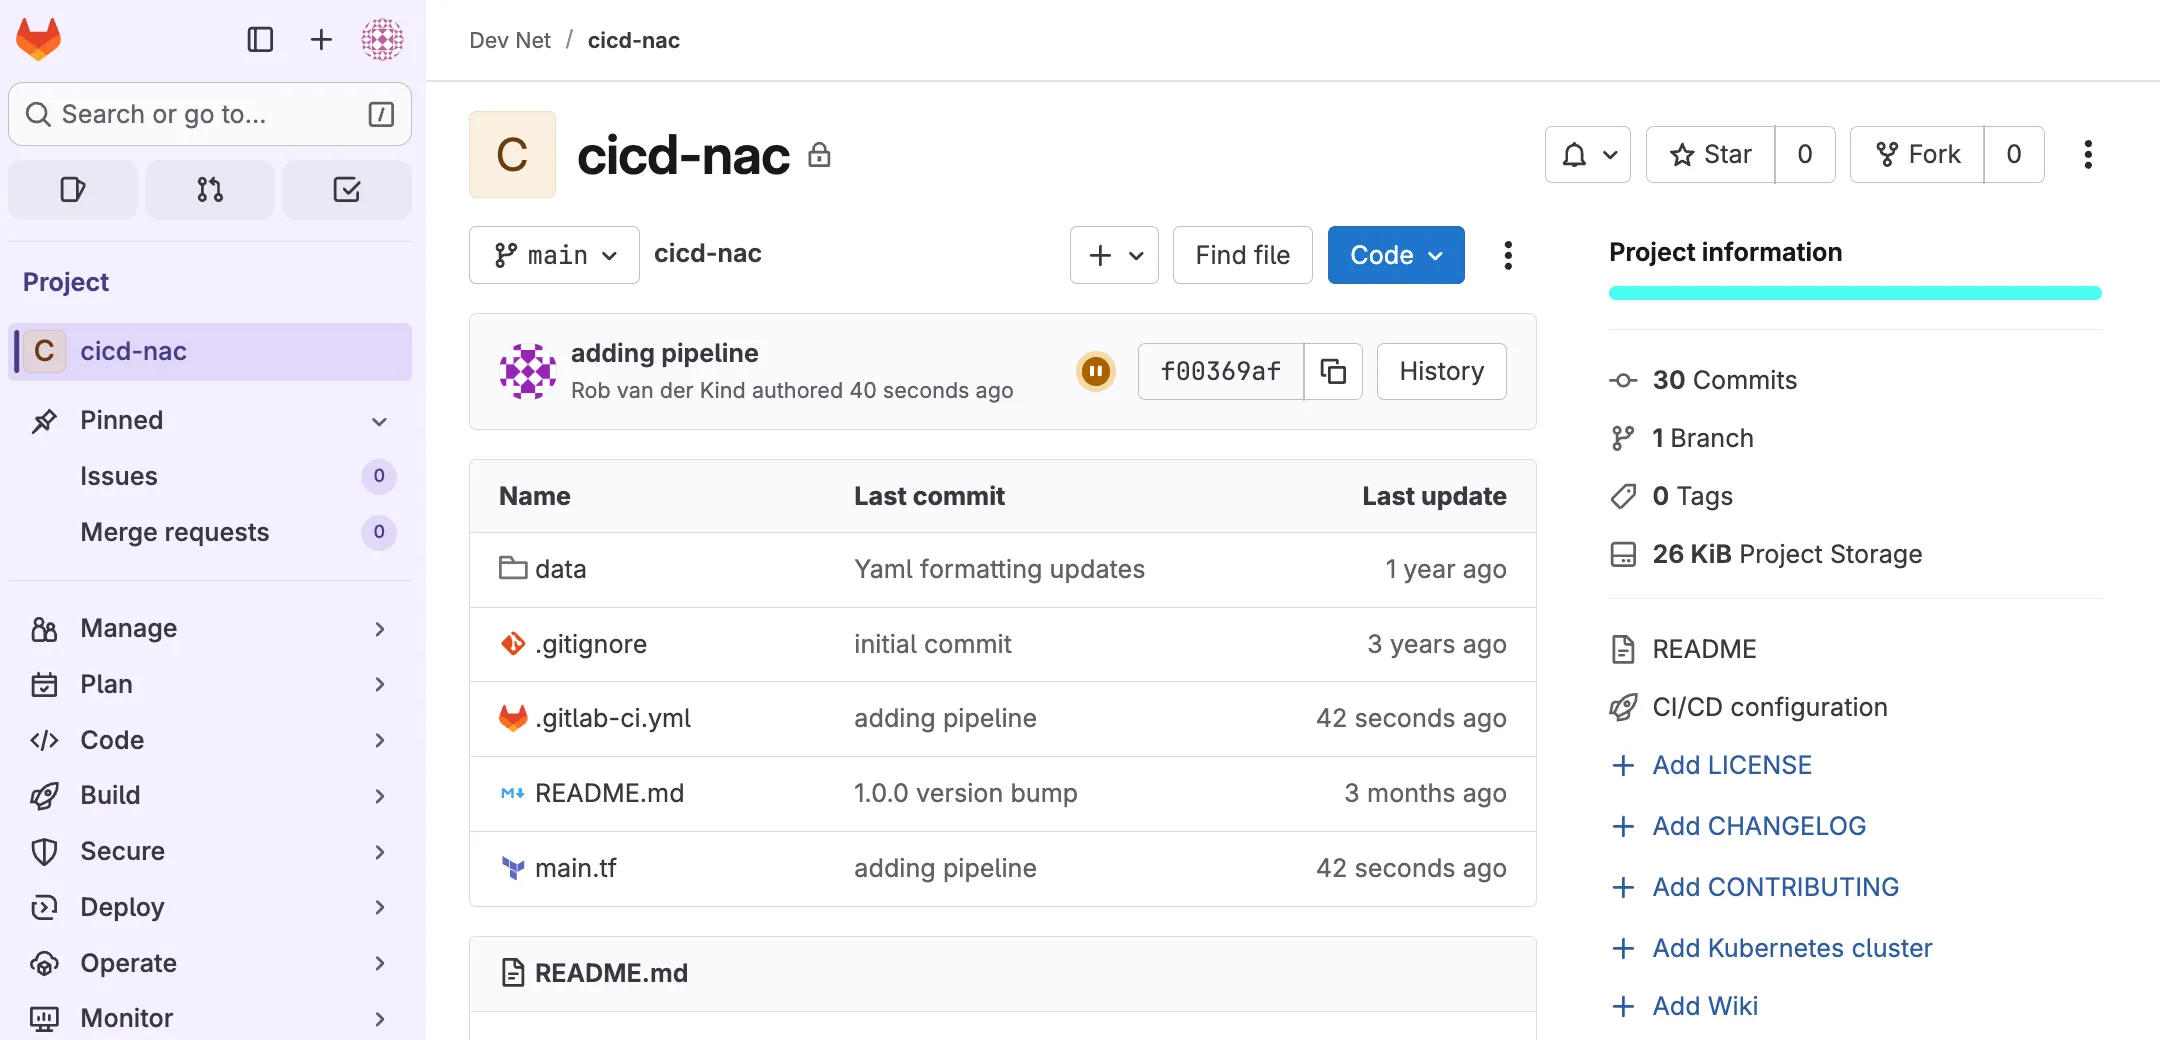
git add .git commit -m "adding pipeline"git pushThe GitLab repository now contains your code and will trigger the pipeline as described in .gitlab-ci.yml.
Step 7: Deploying the configuration
Section titled “Step 7: Deploying the configuration”This pipeline assumes a Continuous Delivery step whereby the code is checked automatically, but requires human intervention to manually trigger the deployment of the changes. Open the project in GitLab and navigate to Build > Pipelines. The pipeline triggered by the push in step 6 should be visible here.
If previous steps were executed correctly, the pipeline will have completed three steps successfully and will be in a blocked state, meaning human intervention is required to proceed.

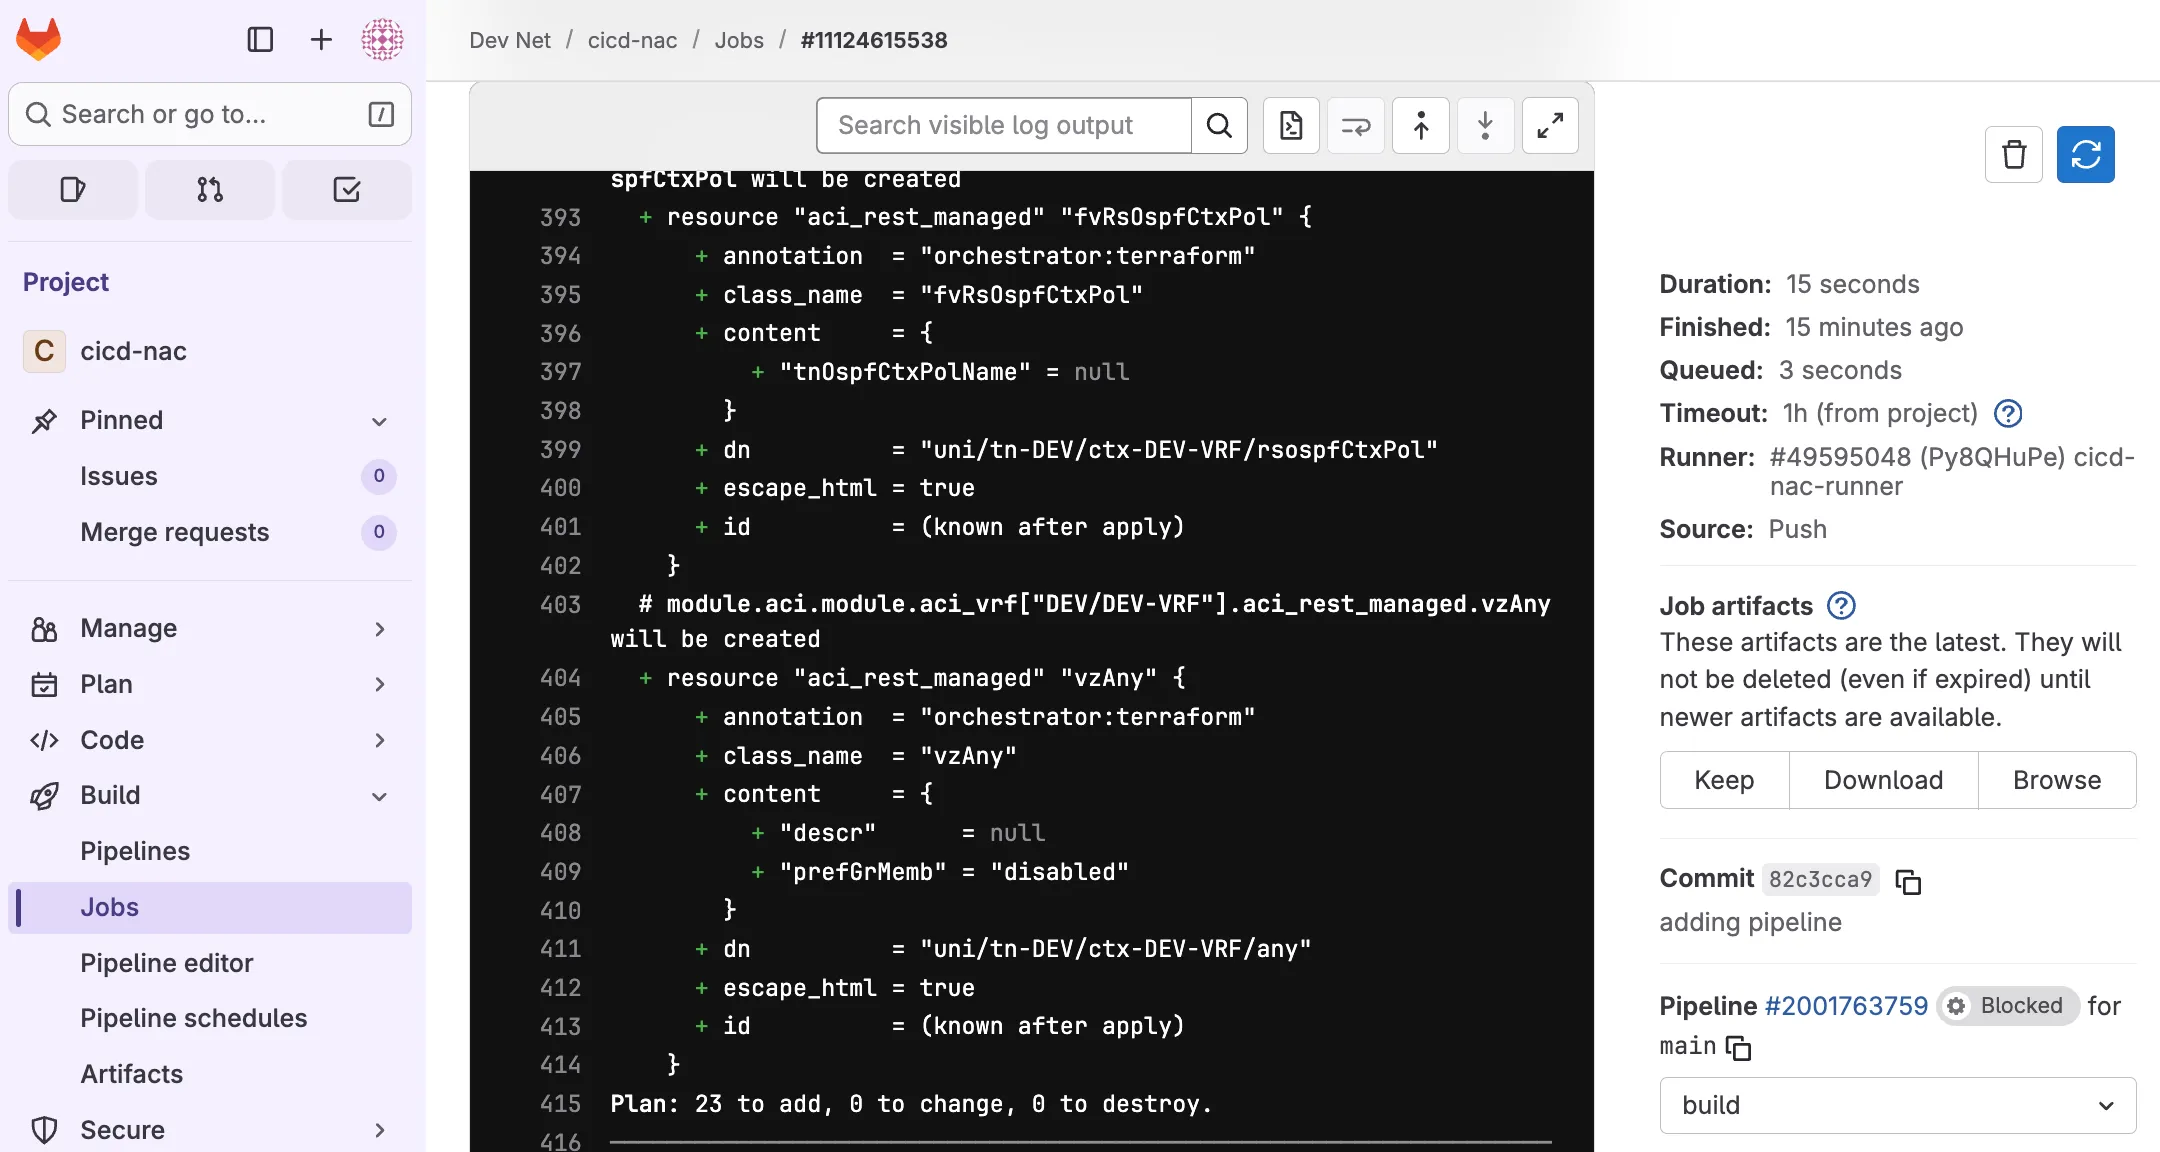
Before clicking deploy it is recommended to navigate to the pipeline and verify the output of the individual jobs by clicking on each completed stage. The output of the build stage will provide an overview of the planned actions.
If any of these steps have failed, the detailed stage view should also provide you the output of any jobs within that stage, providing details to help further troubleshoot.
The build job generated a plan to add 23 resources as shown by the output:
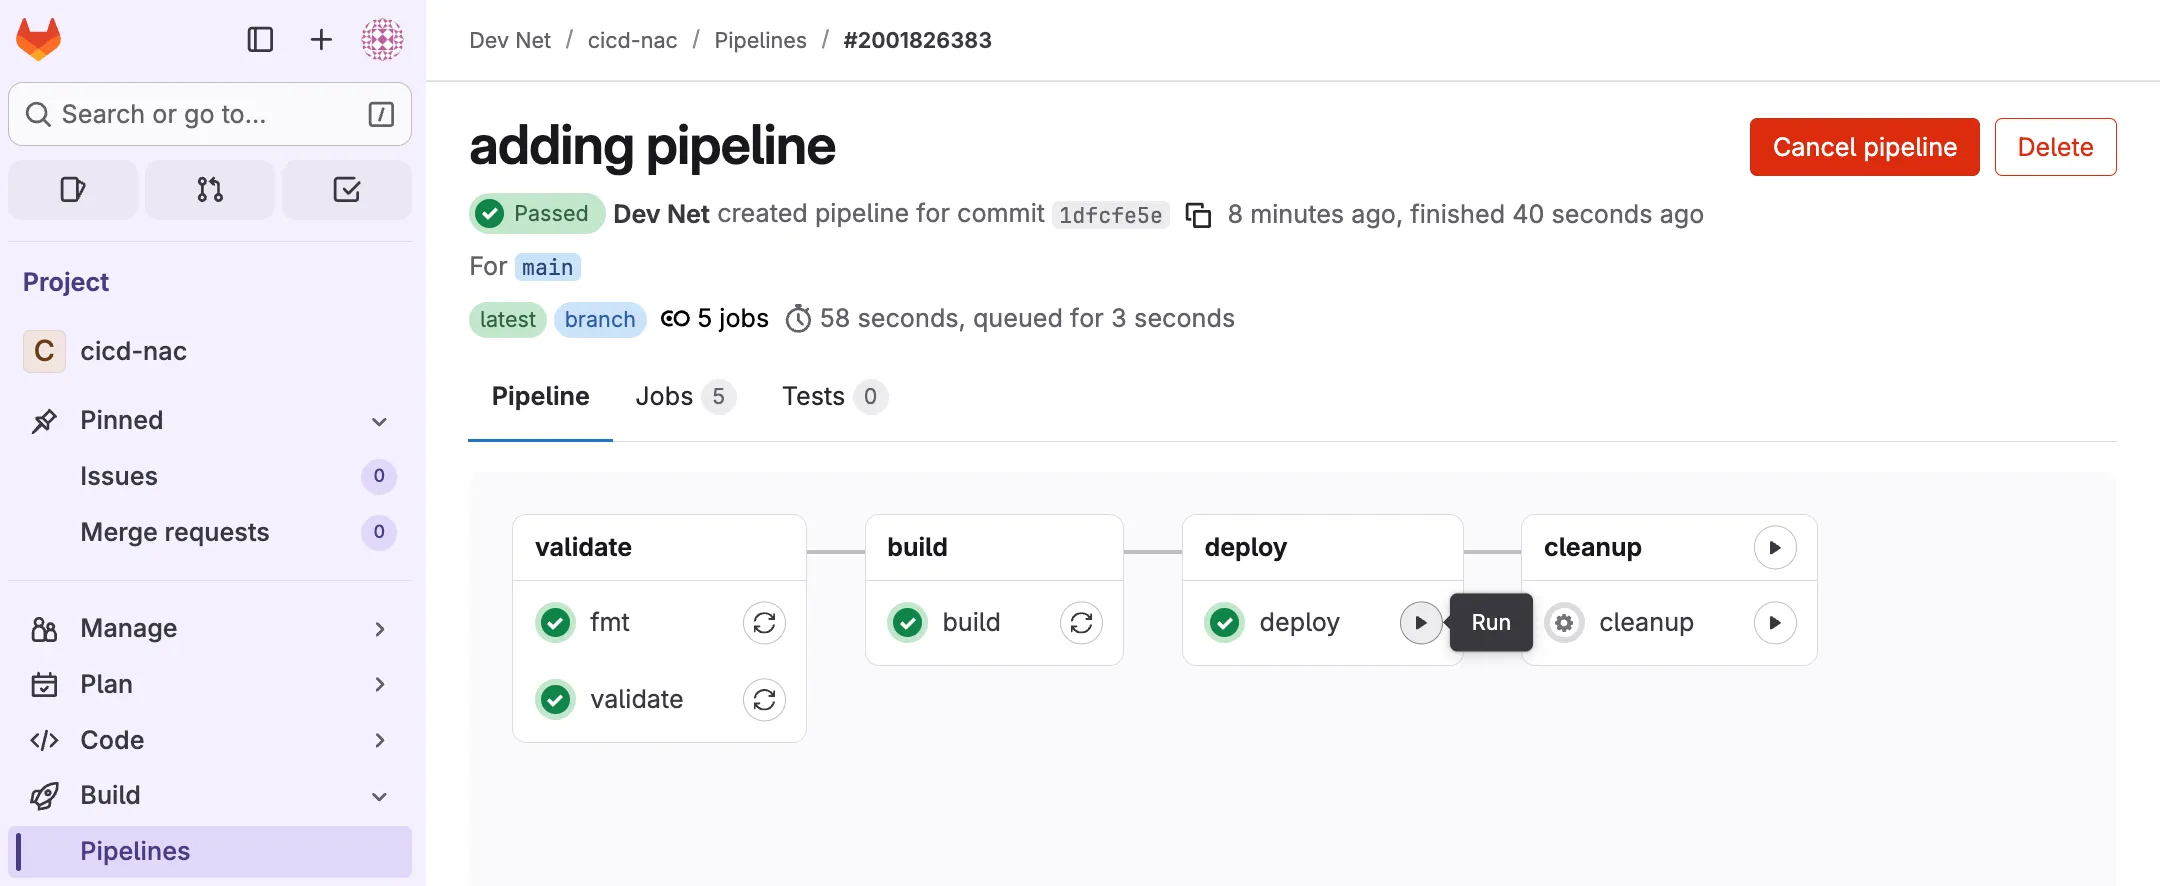
When satisfied with the output of the build job, you can manually trigger the deploy job by clicking play. This will trigger a Terraform apply action and push the configuration to APIC. If you set up the variables in step 5 correctly, this step should successfully complete:
Navigate to APIC to verify that the configuration was deployed successfully:

Optionally, if you wish to automatically deploy your configuration in a truly Continuous Deployment (CD) fashion, you can modify the deploy block in the .gitlab-ci.yml file to always run:
deploy: stage: deploy script: - terraform apply -input=false plan.tfplan dependencies: - build rules: when: alwaysThe cleanup stage is skipped as this would trigger a Terraform destroy, which would remove the deployed configuration.
Step 8: Adding configuration
Section titled “Step 8: Adding configuration”Now that the initial configuration is pushed to the repository and the terraform state is available centrally in GitLab, you or someone else in your team can commit new configuration, which would trigger a new pipeline when pushed the repository.
Open data/tenant_DEV.nac.yaml in your preferred editor / IDE and add the following section:
- name: 10.1.203.0_24 vrf: DEV.DEV-VRF subnets: - ip: 10.1.203.1/24The tenant_DEV.nac.yaml file should now look like this:
---apic:  tenants:    - name: DEV
      vrfs:        - name: DEV.DEV-VRF
      bridge_domains:        - name: 10.1.200.0_24          vrf: DEV.DEV-VRF          subnets:          - ip: 10.1.200.1/24
        - name: 10.1.201.0_24          vrf: DEV.DEV-VRF          subnets:          - ip: 10.1.201.1/24
        - name: 10.1.202.0_24          vrf: DEV.DEV-VRF          subnets:          - ip: 10.1.202.1/24
        - name: 10.1.203.0_24          vrf: DEV.DEV-VRF          subnets:          - ip: 10.1.203.1/24
      application_profiles:        - name: VLANS          endpoint_groups:            - name: VLAN200              bridge_domain: 10.1.200.0_24
            - name: VLAN201              bridge_domain: 10.1.201.0_24
            - name: VLAN202              bridge_domain: 10.1.202.0_24
Save the file, commit and push your changes. Either via Visual Studio Code or locally via command-line interface:
git add data/tenant_DEV.nac.yamlgit commit -m "adding new bd"git pushThis triggers a new iteration of the pipeline that will be in blocked state, waiting for human intervention.
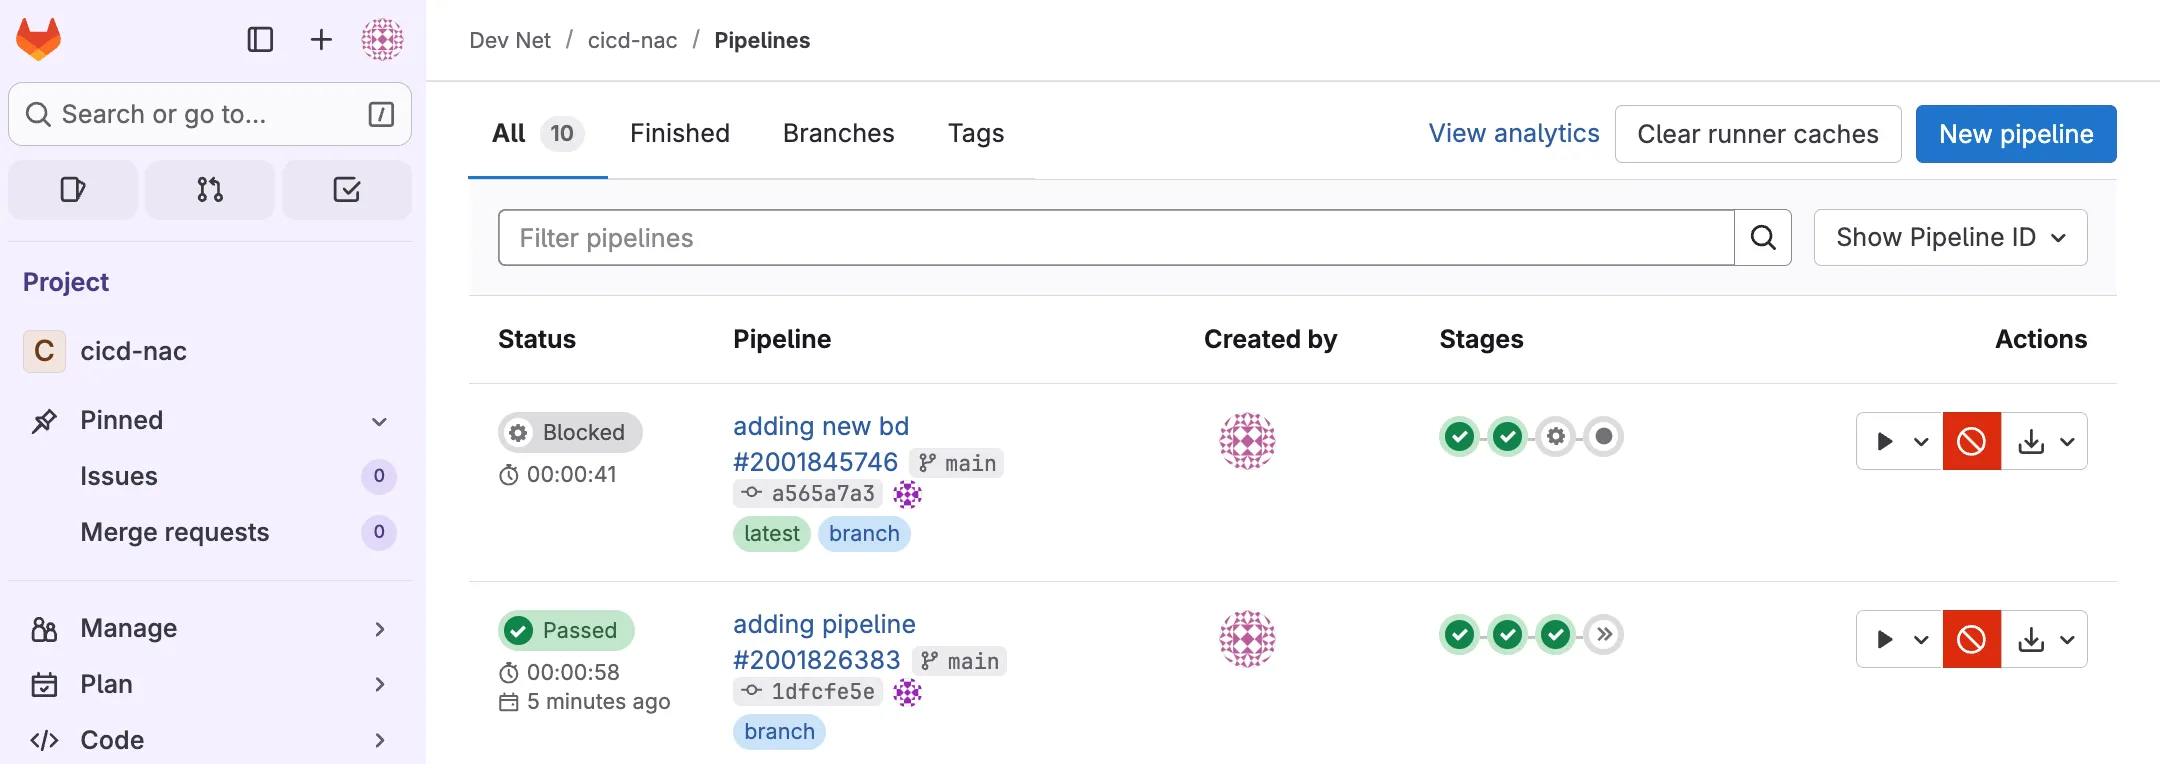
Open the pipeline and expand the build job. Note that Terraform calculated that 3 new resources are to be added.
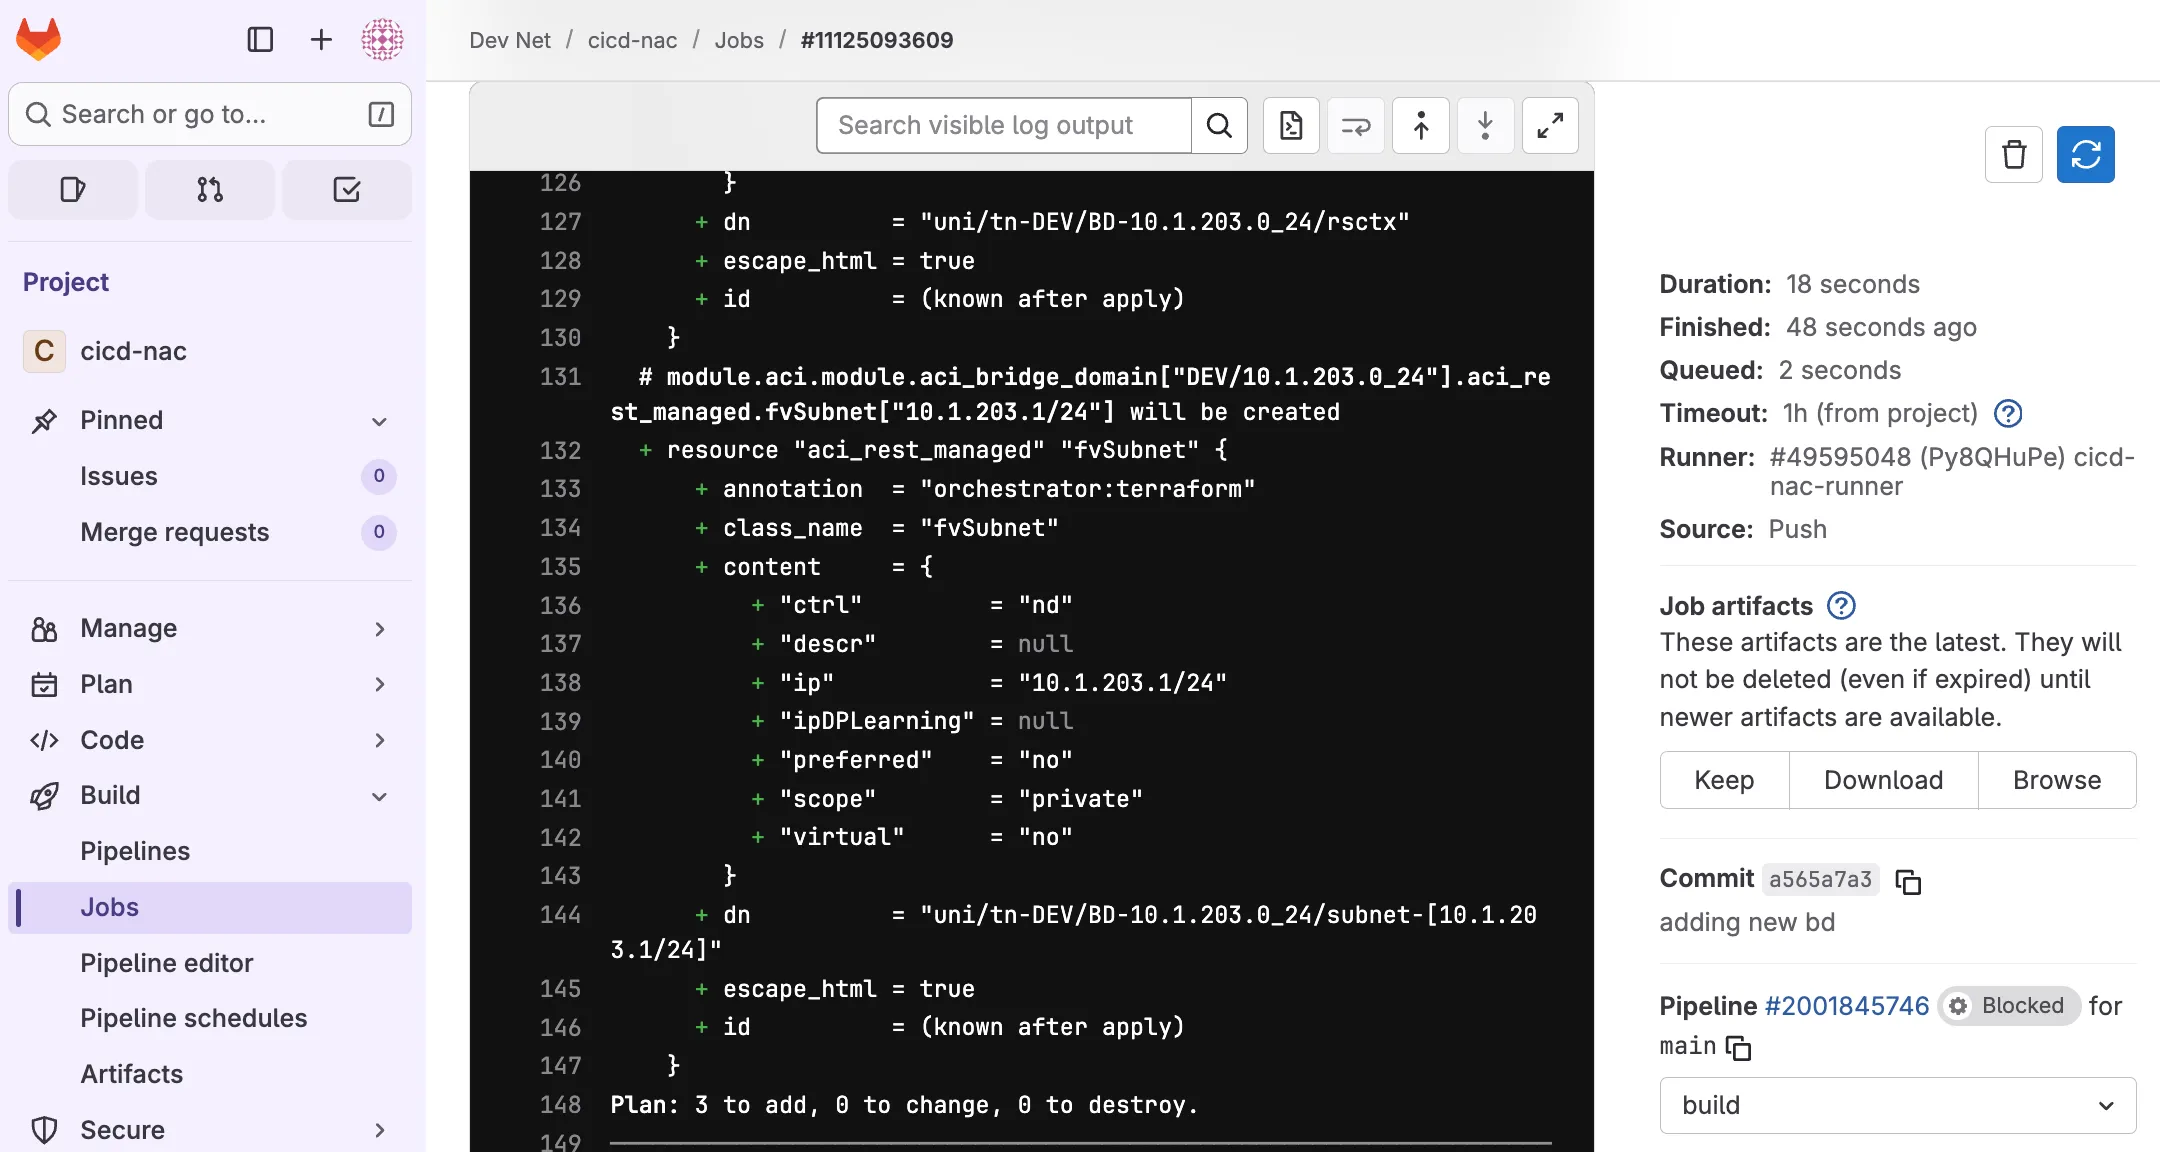
Once satisfied with the proposed changes, deployment can be triggered by clicking the deploy stage play button.
Navigate to APIC to verify that the new Bridge Domain has been added:
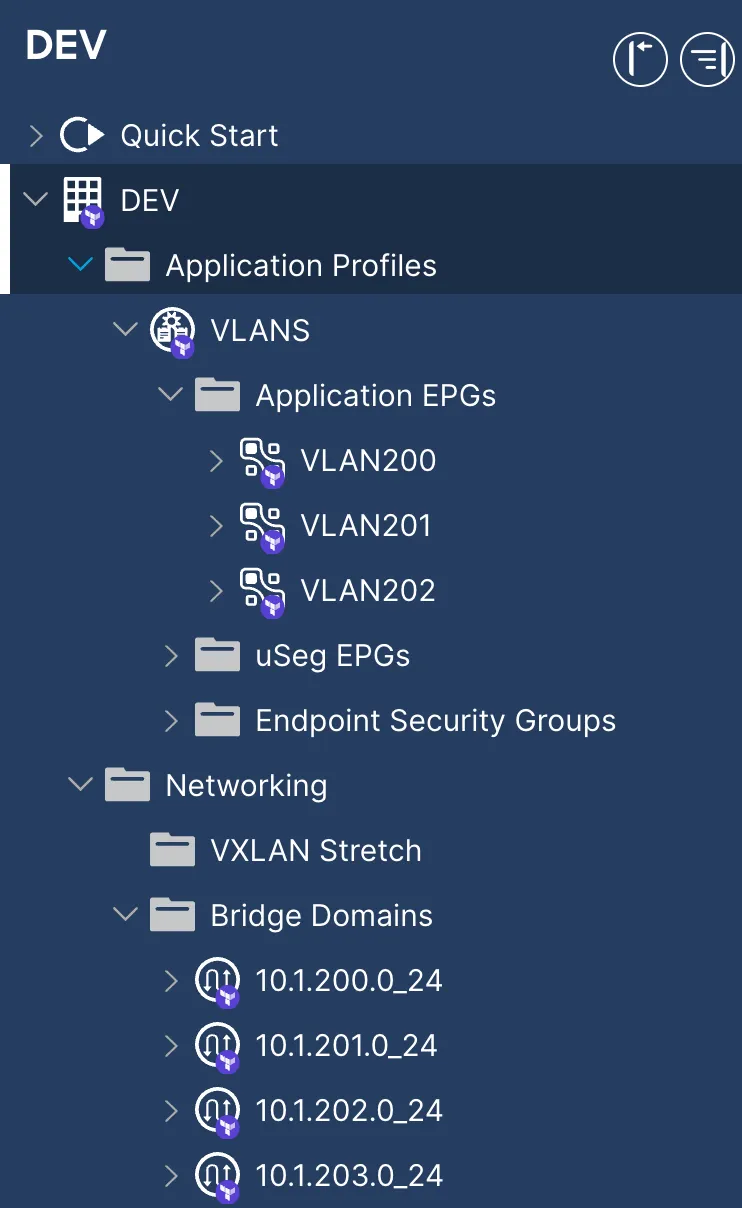
Step 9: Restoring a previous commit
Section titled “Step 9: Restoring a previous commit”Imagine that the Bridge Domain added in step 8 resulted in an outage and you must restore the configuration to an earlier time. Because this change is tracked individually it is easy to revert to to an earlier commit.
Get a list of previous commits with git log in a terminal. Note that Visual Studio Code has a built-in terminal which can be added to the workspace by navigating to Terminal and New Terminal.
git log --pretty=format:"%h%x09%an%x09%ad%x09%s"a565a7a Rob van der Kind Mon Aug 25 13:00:43 2025 +0200 adding new bd1dfcfe5 Rob van der Kind Mon Aug 25 12:48:15 2025 +0200 adding pipeline~output omitted~Note that the output of the git log command also shows any previous commits made against the cloned repository, followed by the two commits made in this example.
By reverting the last commit it is possible to undo any changes associated with that commit.
git revert <your last commit id such as a565a7a>Save the commit message from the terminal (!wq) and push the code:
git pushThis is just one way to revert your change. Although this is the preferred way as now you have the revert action added on top of your commit history. This allows you to track changes or even undo the revert action itself.
Navigate to your project in Gitlab and open the most recent pipeline: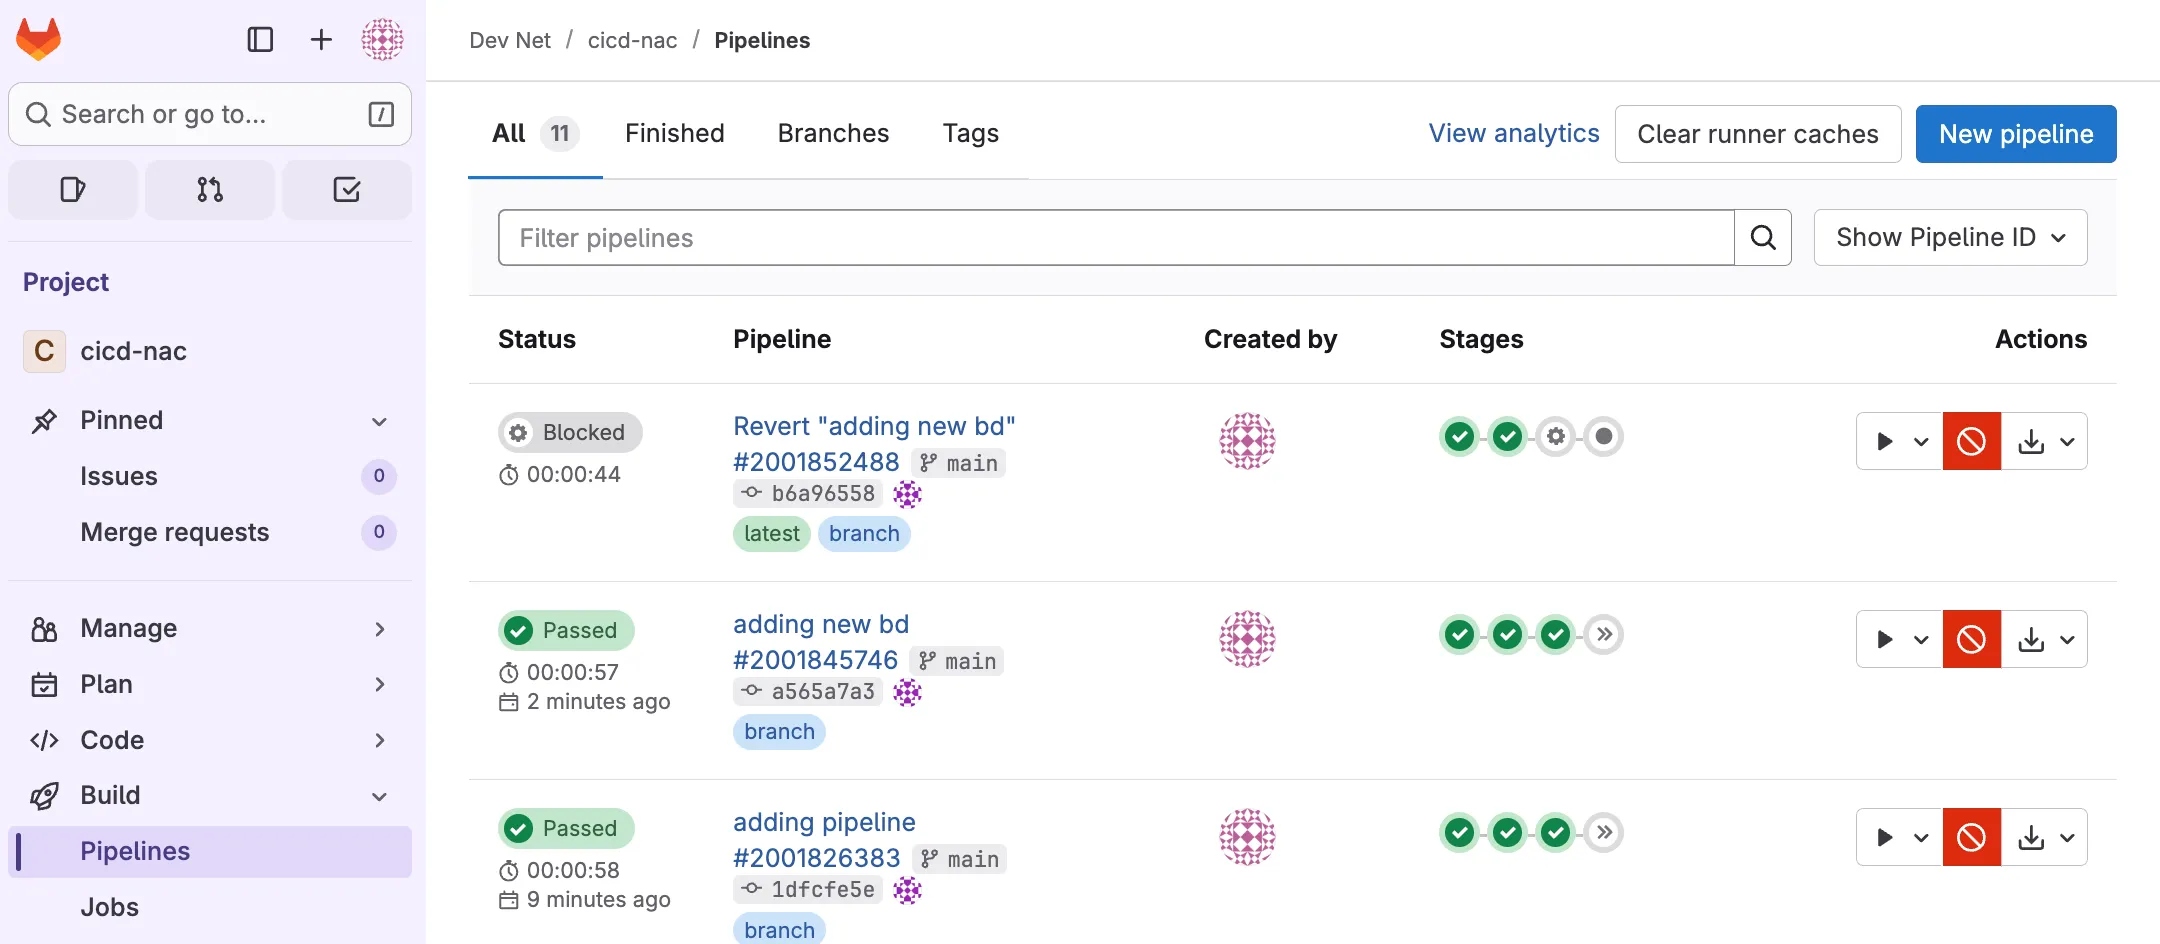
Expand the build job and verify that this Terraform plan will destroy 3 resources:
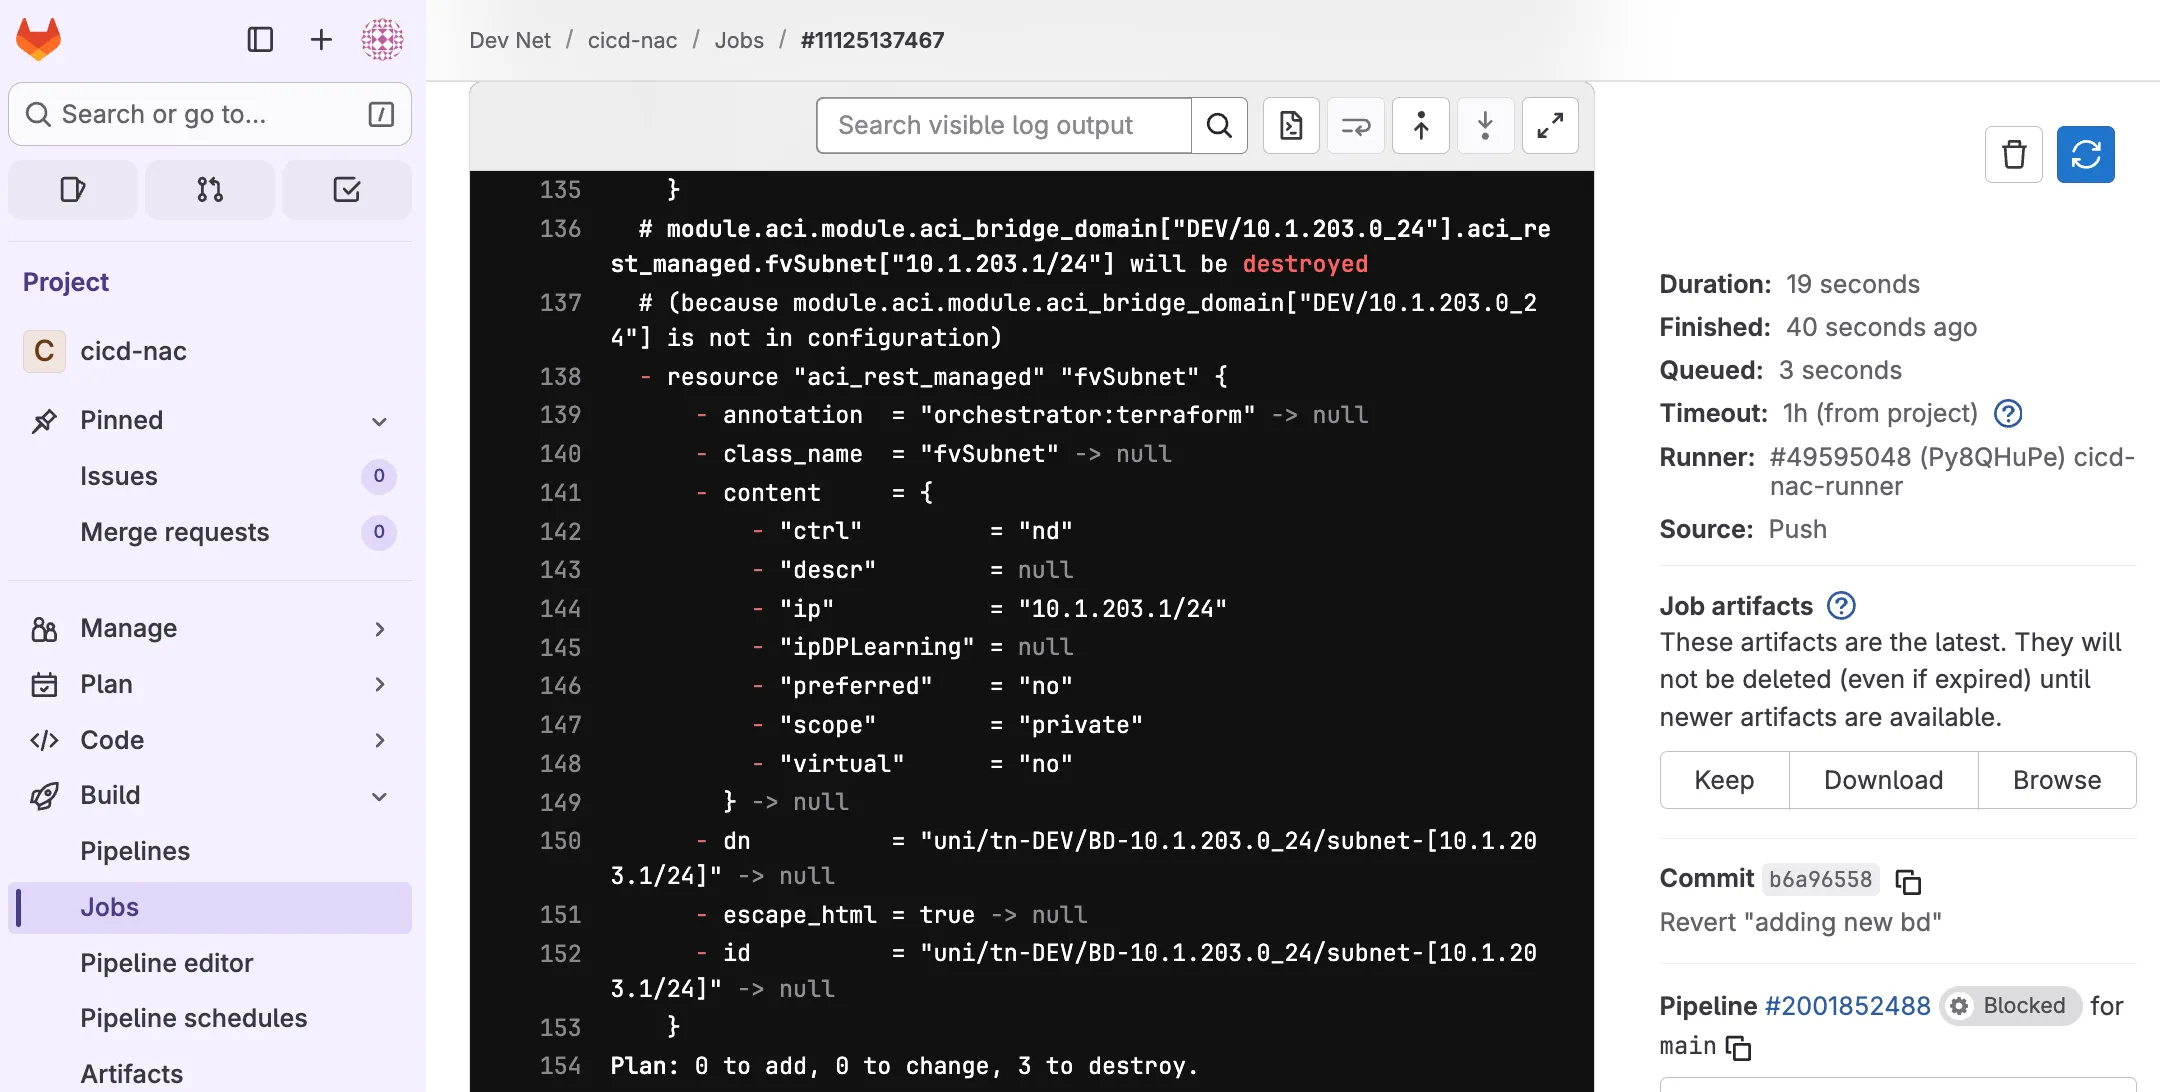
Once satisfied with your changes you can trigger deployment by clicking the deploy stage play button.
Navigate to APIC to verify that the previously added Bridge Domain has been removed.

Step 10: Cleaning up
Section titled “Step 10: Cleaning up”Congratulations. You can now work on your code with multiple team members, start expanding the configuration or even include additional modules such as those shown in the Comprehensive Example section. This CI/CD guide used the code provided in the Simple Example section and is meant to get the reader familiar with some basic automation principles and how to set up a solid foundation for CI/CD.
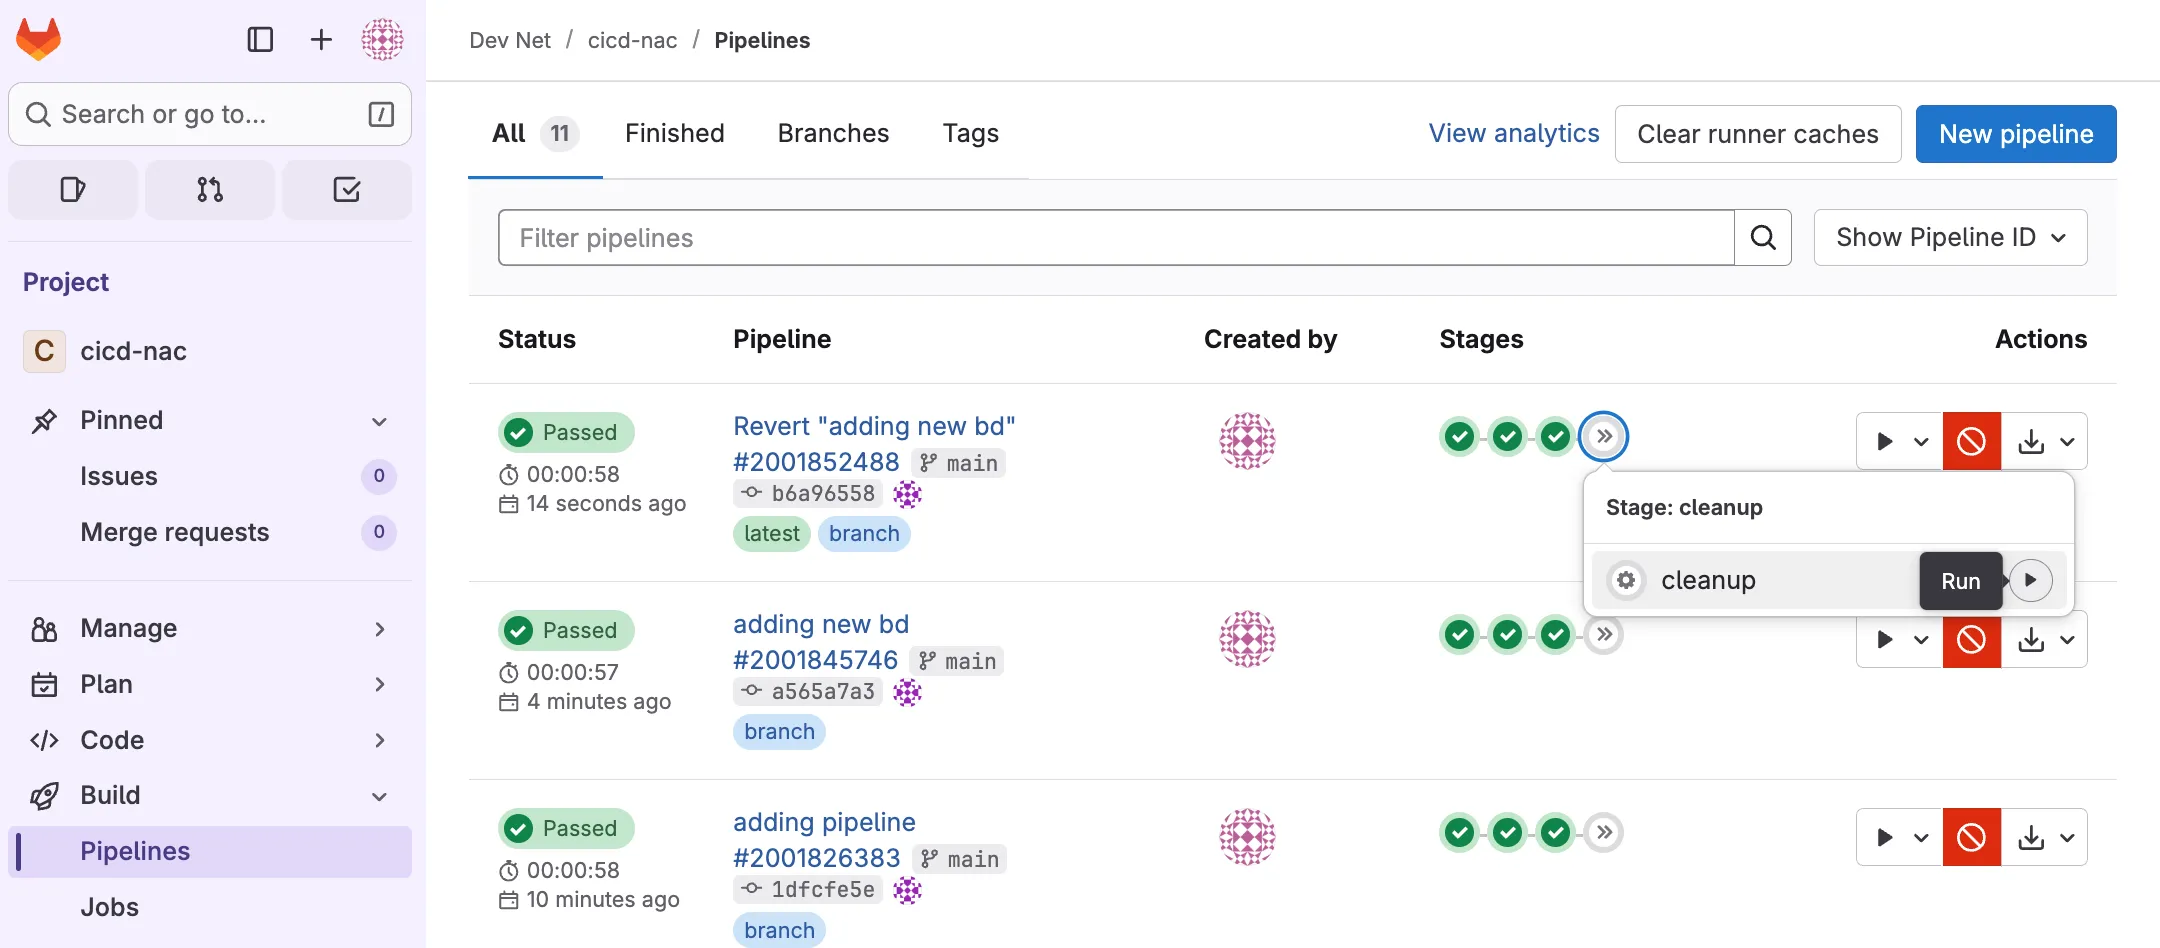
As a final step you can clean up the configuration by manually triggering the cleanup job. Navigate to CI/CD > Pipelines in your project and click on the cleanup play button:
Navigate to APIC to verify that tenant DEV has been removed.