Setup NaC for VXLAN ND
The best method to start working with Network as Code Nexus Dashboard is to clone our example repository. This repository contains the proper directory structure and base files required. In addition the team updates this repository to match with releases so that you get the correct combination of versionss for execution.
Ansible Setup for Network as Code VXLAN ND
Section titled “Ansible Setup for Network as Code VXLAN ND”In this section, you will clone the repository and then setup Ansible for Network as Code VXLAN ND. This includes setting the Python virtual environment, installing necessary packages, and configuring Ansible to work with the Nexus Dashboard.
Before we extract the example repository, we need to understand how the Network as Code Nexus Dashboard repository contains a series of TAGS to match the versions requirements. Why is this? Each release version of the capability is tied to specific versions of the components. In some releases, breaking changes are introduced that require different versions of specific packages. In the example repository, you can see the list of version tags that are available. As of this writing:
| TAGS | Date |
|---|---|
| 0.7.1 | March 2026 |
| 0.7.0 | March 2026 |
| 0.6.0 | February 2026 |
| 0.5.1 | October 2025 |
| 0.5.0 | September 2025 |
| 0.4.3 | July 2025 |
| 0.4.2 | June 2025 |
| 0.4.1 | April 2025 |
| 0.4.0 | February 2025 |
| 0.3.0 | November 2024 |
| 0.2.0 | June 2024 |
| 0.1.0 | June 2024 |
The reason this is important is to avoid issues where changes pushed into the main branch of the example repository may not work with the other components since it is a non tested combination. The TAG is an immutable construct inside of GIT, which means that once a TAG is created, it will always point to the same commit, which is the exact same code. It can’t be changed.
Inside of each of these TAGS, you will find requirements files that match the ansible components that are also required.
Step 1: Clone the example repository
Section titled “Step 1: Clone the example repository”The first step is to clone the example repository that contains the necessary files and configurations for Network as Code (NaC) VXLAN ND. Using the GIT command you will be doing a clone of the example repository into a directory named nac-nd in your home directory.
Note: If you are not familiar with GIT, please refer to the Understanding GIT section of this guide. It provides a starting point to help you understand GIT and the relationship with Network as Code.
cd ~/network-as-codegit clone --depth 1 --branch 0.7.1 https://github.com/netascode/ansible-dc-vxlan-example nac-ndOnce completed you should be able to see the structure inside of the IDE.
Step 2: Remove the .git directory
Section titled “Step 2: Remove the .git directory”After cloning the repository, you will need to remove the .git directory. This is because you will be using this repository as a starting point for your own Network as Code VXLAN ND project. We provide these example reposotories as “starting points”, but you will not be using this repository for yourself. When you delete the .git directory, you will no longer be able to use GIT commands to manage the repository until the repository has been initialized again, which you will do later in this guide.
cd ~/network-as-code/nac-ndrm -rf .gitStep 3: Set local Python virtual environment
Section titled “Step 3: Set local Python virtual environment”With the command pyenv local nac-nd, you will set the local Python version for the current directory to the specified virtual environment. This allows automatic activation of the virtual environment when you navigate to this directory. While we already activated the virtual environment in the previous step, it is a good practice to set the local environment for the directory you are working in. This ensures that any Python commands you run in this directory will use the correct virtual environment.
cd ~/network-as-code/nac-ndpyenv local nac-ndStep 4: Install all python requirement packages
Section titled “Step 4: Install all python requirement packages”When you have a virtual environment operational, requirements for Python packages are then installed inside the virtual environment. This allows you to have different versions of these requirements installed on the same computer without interfering with other projects. In the case of Network as Code VXLAN ND, we define specific versions of Ansible and other packages that are known and tested to work in combination with the Network as Code VXLAN ND capability. These requirements are included in the requirements.txt file that is shared as part of the cloned repository.
ansible-coreansible-lintjmespathmacaddressnetaddrpackagingrequests
In addition we must also install the two packages part of Network as Code for testing and validation.
nac-validatenac-test
cd ~/network-as-code/nac-ndpip install -r requirements.txtStep 5: Install Ansible Collection
Section titled “Step 5: Install Ansible Collection”The ansible collection requirements are defined in the requirements.yaml file located in the root of the cloned repository. This file specifies the Ansible collections and plugins that are required for the Network as Code VXLAN ND capability.
These include:
community.generalansible.posixansible.utilsansible.netcommoncisco.dcnm-> Cisco DCNM Collectioncisco.nac_dc_vxlan-> Cisco NAC DC VXLAN Collection
ansible-galaxy collection install -r requirements.yamlThe collection cisco.nac_dc_vxlan is the main collection that contains the Ansible roles and modules specifically designed for Network as Code VXLAN ND.
Note: If an error happens when attempting the install, re-run the ansible-galaxy command. Sometimes it seems that the first time it runs, it fails to download the collection from the dCloud environment.
Step 6: Setup ansible.cfg file
Section titled “Step 6: Setup ansible.cfg file”In this step you will be setting up the ansible.cfg file. This file is used to configure Ansible’s behavior and settings. The configuration file is located in the root of the cloned repository. The file doesn’t exist, so you will create it. We will be using some special commands with code server to set this up.
cd ~/network-as-code/nac-ndcode-server ansible.cfgOnce the file opens in the Code Server IDE, you will add the following content to it:
[defaults]callback_whitelist=ansible.posix.timer,ansible.posix.profile_tasks,ansible.posix.profile_rolescallbacks_enabled=ansible.posix.timer,ansible.posix.profile_tasks,ansible.posix.profile_rolesbin_ansible_callbacks = True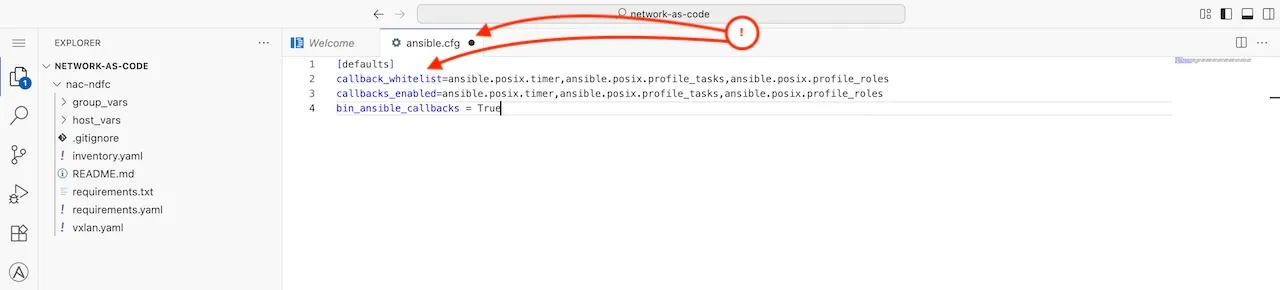
Once added then save the file.
Step 7: Verify Ansible installation
Section titled “Step 7: Verify Ansible installation”ansible --versionWhich should have output similar to:
ansible [core 2.16.3] config file = /home/dcloud/network-as-code/nac-nd/ansible.cfg configured module search path = ['/home/dcloud/.ansible/plugins/modules', '/usr/share/ansible/plugins/modules'] ansible python module location = /home/dcloud/.pyenv/versions/3.12.10/envs/nac-nd/lib/python3.12/site-packages/ansible ansible collection location = /home/dcloud/.ansible/collections:/usr/share/ansible/collections executable location = /home/dcloud/.pyenv/versions/nac-nd/bin/ansible python version = 3.12.10 (main, Jun 26 2025, 09:14:15) [GCC 11.4.0] (/home/dcloud/.pyenv/versions/3.12.10/envs/nac-nd/bin/python) jinja version = 3.1.6 libyaml = TrueUnderstanding the file structure
Section titled “Understanding the file structure”The host_vars directory has the complete data structure of the Network as Code data model. The group_vars directory contains general information that is utilized to connect to Nexus Dashboard. In this case, you will have a group called nd that contains the configuration for the Nexus Dashboard.

In addition to the host_vars and group_vars directories, there is also an inventory.yaml file. This file is used to define the inventory of hosts that Ansible will manage. In this case, it will contain the Nexus Dashboard as a host. Inside of some of these files are references to environment variables. These variables are used by Ansible to connect to Nexus Dashboard.
ND_HOST: The hostname or IP address of the Nexus Dashboard.ND_USERNAME: The username for the Nexus Dashboard.ND_PASSWORD: The password for the Nexus Dashboard.ND_DOMAIN: The domain for the Nexus Dashboard.NDFC_SW_USERNAME: The username for the Nexus Dashboard switch.NDFC_SW_PASSWORD: The password for the Nexus Dashboard switch.
These files read environment variables, to pass credentials and connection details securely to the playbooks without hard-coding sensitive information in the repository.
Step 8: Set environment variables
Section titled “Step 8: Set environment variables”To set the environment variables, you will need to create a .env file in the root of the cloned repository. This file will contain the necessary environment variables for connecting to Nexus Dashboard and executing the automation. This file is not committed to the repository, so you will need to create it manually. And it is also ignored by git on purpose to make sure that you don’t accidentally commit sensitive information into the repository.
Note: In a future chapter of this document you will learn how these variables are used inside automation pipeline software. The key here is that these variables are read by the Network as Code automation code such that you never embed coded credentials inside of a repository.
The variables used by the automation are:
cd ~/network-as-code/nac-ndcode-server .envIn the opened file you will add the following content:
export ND_HOST="198.18.133.100"export ND_USERNAME="admin"export ND_PASSWORD="C1sco12345"export ND_DOMAIN="local"export NDFC_SW_USERNAME="admin"export NDFC_SW_PASSWORD="C1sco12345"export DC_VXLAN_SCHEMA="schema/schema.yaml"Then save the file.