Lab Environment Setup
For this lab we will be utilizing Cisco dCloud to provide a lab environment that is pre-configured with Nexus Dashboard and the necessary components to run the Network as Code (NaC) VXLAN ND capability. You are required to schedule the lab in Cisco dCloud that is available at Cisco dCloud. You must have an account in Cisco dCloud to be able to access the lab environment.

Once you have scheduled the lab, you will then be provided VPN instructions to follow in order to connect.
The lab topology looks like this:

Once you have scheduled the lab, you will be accessing the lab environment components invidividually. Each are:
| Component | Description | URL | Credential |
|---|---|---|---|
| Nexus Dashboard | The central management platform for the VXLAN/EVPN fabric. | Nexus Dashboard | Username: adminPassword: C1sco12345 |
| Code Server | This is a web based version of Visual Studio Code that will be the central point for your development in this lab. It is pre-configured with the necessary tools and extensions to work with Network as Code. | Code Server | Password: C1sco12345 |
| GitLab | The GitLab instance is used to manage the code repositories for the Network as Code (NaC). This guide will touch in GitLab as a way to manage the code repositories for the Network as Code (NaC) in a way that would be used by network operators for Day-2 Infrastructure as Code operations and pipelines. If you are only interested in learning Network as Code to perform a deployment, you could skip this section. | GitLab | Username: labuserPassword: C1sco12345 |
| CML Topology | The CML topology is used to simulate the network devices that will be managed by Nexus Dashboard. This allows you to easily test Network as Code in a lab. | CML Portal | Username: labuserPassword: C1sco12345 |
Lab Environment
Section titled “Lab Environment”The primary interface for this lab is the Code Server instance. Here you will be able to modify code that is described in the lab guide and also use the Linux terminal to execute the automation tasks. You will use your web browser to access the Code Server instance, which will obviate the need for a remote desktop client.
Step 1: Connect to Code Server
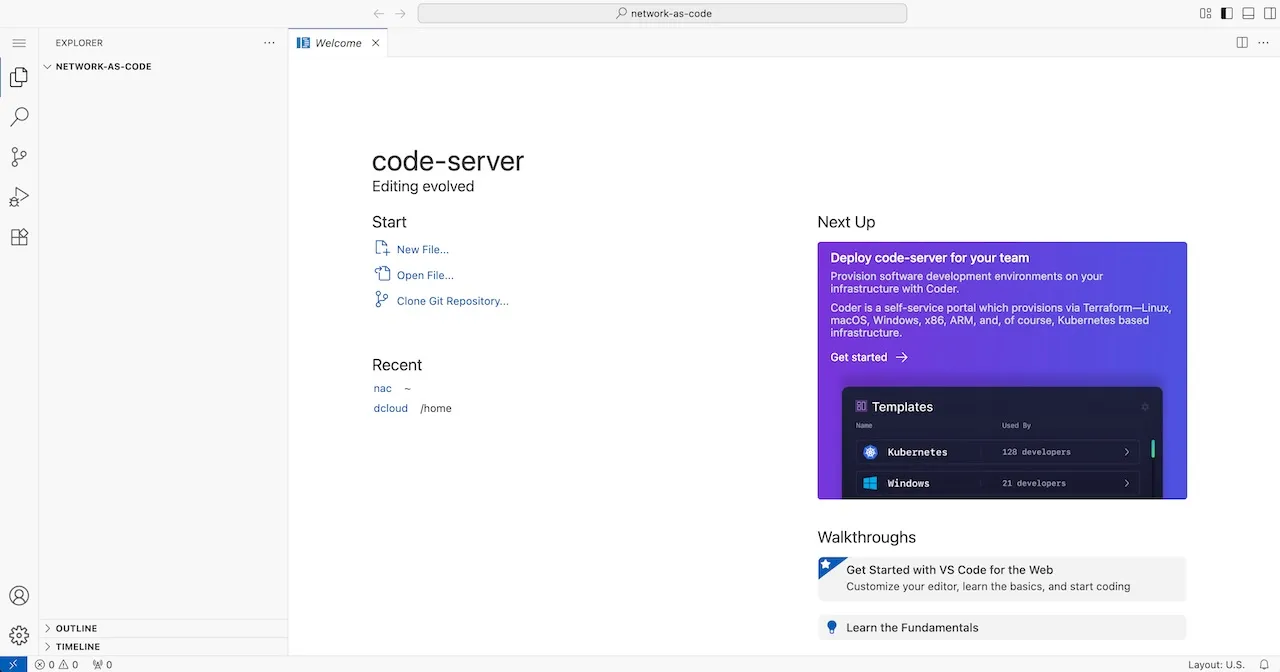
Section titled “Step 1: Connect to Code Server”The first step is to connect to the Code Server instance. The URL is: Code Server and the password is C1sco12345. Your browser will look similar to:

Step 2: Open the terminal
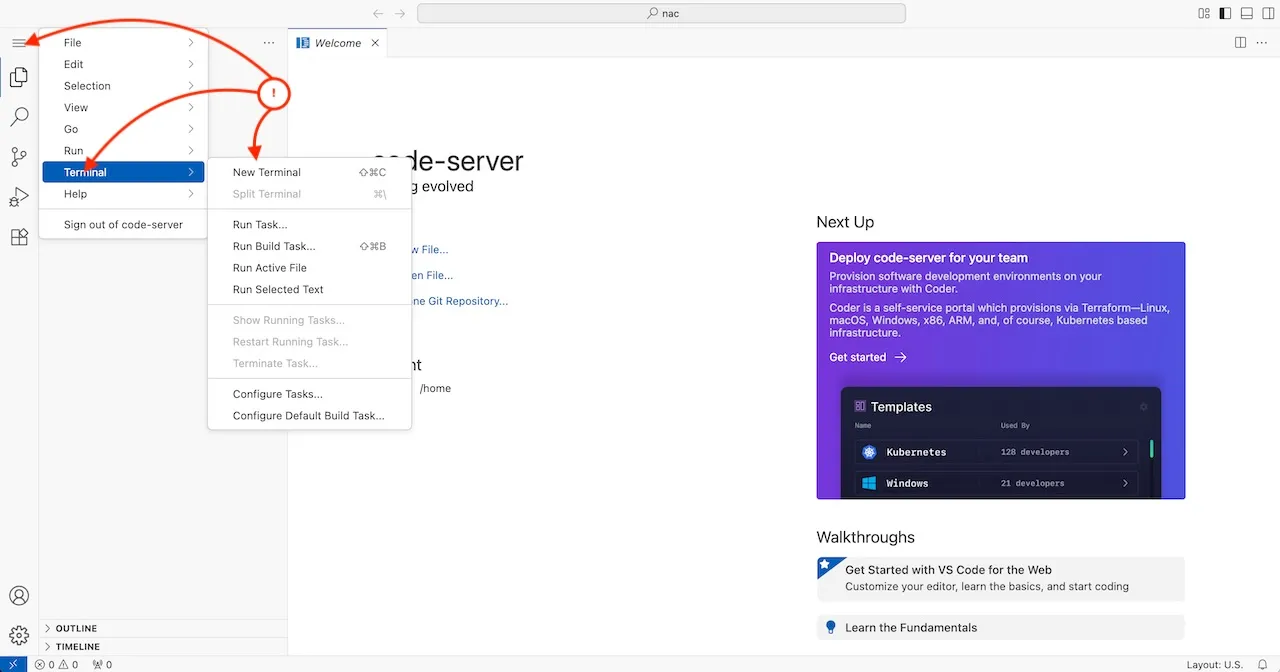
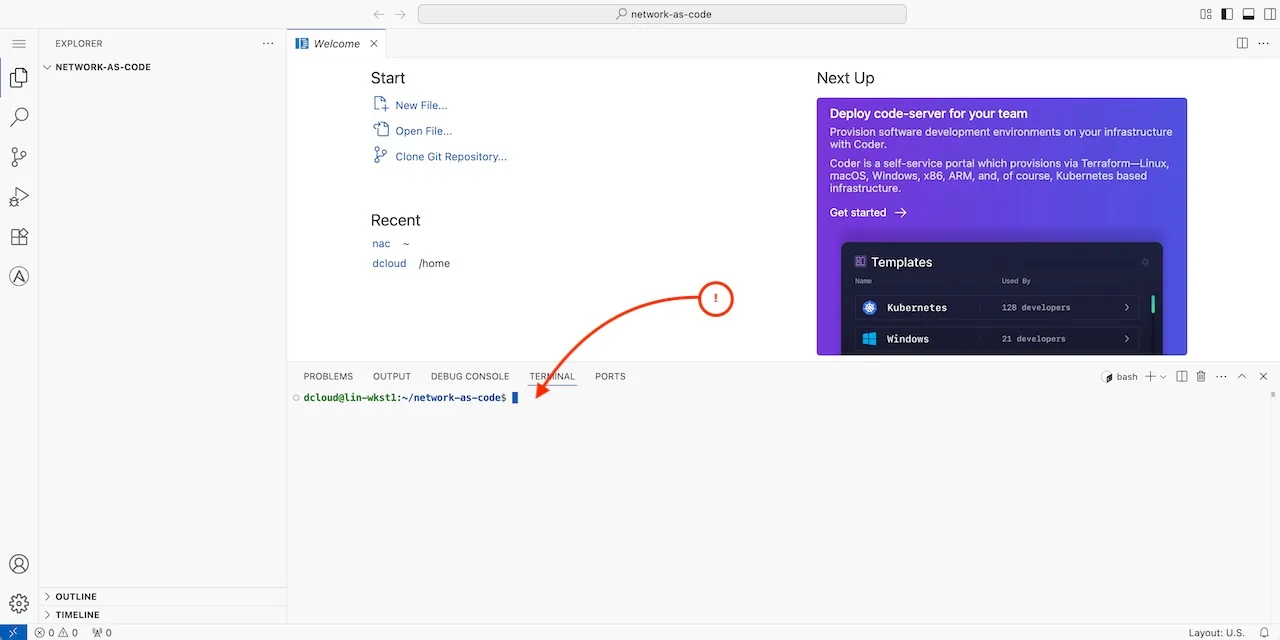
Section titled “Step 2: Open the terminal”To access the terminal, click on the menu icon on the top left and select “Terminal” > “New Terminal”. This will open a terminal window at the bottom of the Code Server interface.

The Network as Code (NaC) capabilities utilizes Ansible as its core automation engine. To effectively use Ansible with Nexus Dashboard, you need to set up an Ansible collection that contains the necessary modules and plugins for interacting with Nexus Dashboard. Running the capability requires a working environment that includes Ansible, Python, and the necessary dependencies. This document will guide you through setting up the environment to run the NaC VXLAN ND capability with a focus on the included lab environment available in Cisco dCloud.
Why the need for a Python virtual environment?
Section titled “Why the need for a Python virtual environment?”Whenever you wish to run Ansible you should setup a Python environment to work with it. In a computer running Python you could just install everything at the system level (think as if you were installing an application for everyone in the system ) or you can install it by creating what is known as a virtual environment. Installing Python at the system level may lead to many potential pitfalls and errors. For this reason it is highly recommended to use tools like pyenv to manage your Python versions and virtual environments.
Python virtual environments allow for easy packaging of the requirements that specific Python code needs to run. For example, you can install different versions of Ansible in different virtual environments for different Ansible executions on your computer. You could have some automation that you know works with a specific version and you want to ensure execution every time it runs without issues.
The first step using pyenv is to install the version of Python that you wish to use. In this case we will be installing Python 3.12.10. This is the version that is used in this lab and it is the version that is used in the Ansible content that you will be using. Due to the fact that this downloads and compiles Python, we have completed this task ahead for you. The command would be pyenv install 3.12.10.
When you install the version of python with pyenv, it will provide you with a list of installed versions. This is one of the key benefits of using pyenv, as it allows you to manage multiple versions of Python on your system.
Installing PyEnv
Section titled “Installing PyEnv”There are many documents online to help you install pyenv on your system. We have a brief set of instructions for installing pyenv on MacOS, Linux, and Windows. This also includes links to the official documentation for pyenv for your specific operating system.
For the purpose of this lab, we have installed pyenv on the Code Server instance.
Setting up a Python virtual environment for Network as Code VXLAN ND
Section titled “Setting up a Python virtual environment for Network as Code VXLAN ND”These steps will happen in the Terminal windows you opened earlier in the Code Server instance.

Step 1: Create a Python virtual environment
Section titled “Step 1: Create a Python virtual environment”Create a virtual environment using pyenv with the Python version you installed. This will create a new virtual environment named nac-nd using Python 3.12.10. The pyenv local command sets the local Python version for the current directory to the specified virtual environment. This allows automatic activation of the virtual environment when you navigate to this directory.
pyenv virtualenv 3.12.10 nac-ndpyenv activate nac-ndStep 2: Update PIP
Section titled “Step 2: Update PIP”PIP is a package manager for Python that allows you to install and manage Python packages. It is recommended to update PIP to the latest version before installing any packages.
pip install --upgrade pipWith this you can proceed to install what is needed for Network as Code Nexus Dashboard.
Step 3: Install Ansible
Section titled “Step 3: Install Ansible”You will be installing ansible-core instead of just ansible. The reason you are installing core is to get the granularity of control over the Ansible version you are using. Ansible-core is a minimal version of Ansible that includes only the core functionality, without any additional plugins or modules. This is useful for ensuring compatibility with the Nexus Dashboard and the specific Ansible collection you will be using.
| Ansible Core | Ansible |
|---|---|
| Lightweight Installation | Full Installation |
| Ansible installs only the core components | Ansible installs all collections with the Ansible install |
| Collections must be installed manually | Complete package but consumes more disk space |
| Assures install of latest collection version released! | Might not install the latest version of the collection! |
pip install ansible-core | pip install ansible |
To install Ansible core, run the following command in the terminal:
pip install ansible-core==2.17.10Step 4: Install Ansible Linter
Section titled “Step 4: Install Ansible Linter”Ansible Lint is a tool that checks Ansible code structure for best practices and potential issues. It is very useful when working with everything Ansible. Many of the work you will be doing with Ansible is hidden, but it will be of assistance in areas that you will see shortly.
pip install ansible-lint==24.10.0Step 5: Install JMESPath
Section titled “Step 5: Install JMESPath”JMESPath is a query language for JSON that allows you to extract and manipulate data from JSON documents. It is used by Ansible to parse and filter JSON data. The version we will be using is 1.0.1, which is compatible with the Ansible version we are using.
pip install jmespath==1.0.1